Enabling Auditing for a Custom Class

APM allows auditing for all custom classes. Many APM base classes have auditing enabled by default. When auditing is active, the system creates a snapshot of the before and after values of any of the audited attributes and relationships that have changed. The audit record includes the date and time of the change and the user responsible for the change.
For example, APM automatically tracks changes made to an asset’s classification, age, and degradation rates, among others. In addition, various actions are automatically recorded to work requests including when it has been approved or linked to a work order, and so on.
Below is an example of the list of pre-defined audit details for the asset class:
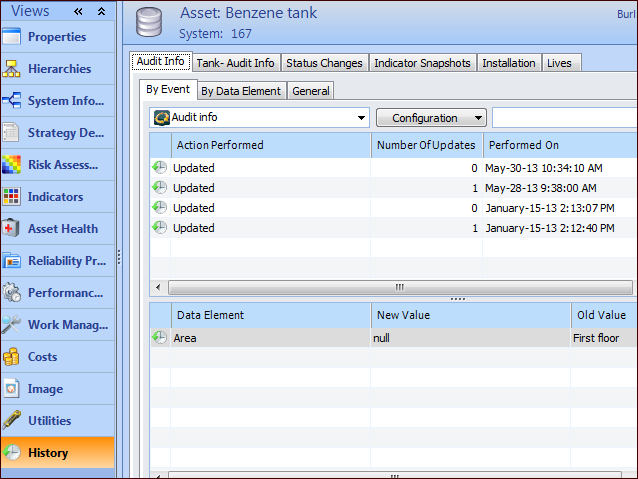
If you want to alter what gets recorded for a base class, you must first create a new custom class based on the APM class, enable auditing, and then assign which data and actions will be audited. After completing those steps, you must incorporate the custom class and auditing classes into the user interface in order for the audit data to be recorded and seen. For more information, see Customizing the User Interface (UI).
When auditing is turned on and changes are made and saved to the class, details of the changes are either listed in the object’s menu, History method, or listed in the appropriate History view. For example, the audit history for a pump asset is shown below:
Note: You must be logged on as an APM administrator and lock the system for customization before you can enable and define auditing.
This topic explains how to enable auditing for a custom class from scratch and for a custom class based on APM class.

To Enable Auditing for a Custom Class from Scratch

1.
2.
On the Properties view, select the Auditing tab. For example:
3.
Select Audit Changes to instances of this class to enable auditing.
4.
Click Generate Audit Classes. APM creates the audit info class and audit details classes that store auditing information for this class. These audit classes are also displayed in the list of customized classes.
Note: The audit info and audit details classes are not automatically deleted if their custom class is deleted.
5.
On the Data to Audit tab, click Browse to select each data element that you want to record for this class. The elements appear in the list.
6.
On the Actions to Audit tab, select the All Methods configuration, and then click Browse to select each method that you want to record for this class and click OK. The actions appear in the list.
7.
The class is now ready to record audit information, however, in order to view audited changes on an object’s History view, you must edit the appropriate view or panel to incorporate this data in the user interface. For more information on editing views and panels, see Editing an APM View or Panel.
8.

To Enable Auditing for a Custom Class Based on APM Class

9.
10.
On the Properties view, select the Auditing tab. By default, auditing is enabled and the audit info and audit details classes are defined. For example:
11.
Select the Data to Audit tab. By default, this tab displays all default data elements audited by the system for the APM base class. Click Browse to select each additional data element that you want to record for this class, or right-click and select Delete for any element that you do not want to audit. The elements you have chosen appear in the list.
12.
Select the Actions to Audit tab. By default, this tab displays all default actions audited by the system for the APM base class. Click Browse to select each action that you want to record for this class, or right-click and select Delete for any element that you do not want to audit. The actions you have chosen appear in the list.
13.
The class is now ready to record audit information, however, in order to view audited changes on an object’s History view, you must edit the appropriate view or panel to incorporate this data in the user interface. For more information on editing views and panels, see Editing an APM View or Panel.
14.