Customizing Toolbars

You can customize the toolbar that appears below the menus and above the banner for any class. Note that you cannot create a standard toolbar that replaces the toolbars throughout APM at this time. A custom toolbar appears only on primary windows for the class where you created it.
If you are creating toolbars for a custom class that was created from scratch, or if you are editing toolbars for a custom class that is based on an APM class, you can edit the toolbars from the base class. In order to do this, you will copy (reinherit) the toolbars from the base APM class and then add or remove buttons.
Some toolbar items are standard in Windows-based applications. You can create more than one toolbar for each class; each toolbar can be displayed or moved separately.
You can perform three functions to create your custom toolbar:
You determine the order of all of these elements, so you can use the gray separator lines to group your toolbar buttons. Each method and view has an icon associated with it, so the toolbar will appear as a row of buttons.
You can create toolbar buttons that invoke a method, choosing from a list that includes all methods on all classes in APM. Note that not all methods will work from all views. Most of the time you will want to choose a common method or a method from the base copy of the class you are customizing. In addition, you can create toolbar buttons to display a dialog you have created for the class you are customizing.
The main steps in customizing toolbars are:

To Create a Custom Toolbar

1.
2.
Select the Customization Center view.
3.
Click Lock System for Customization.

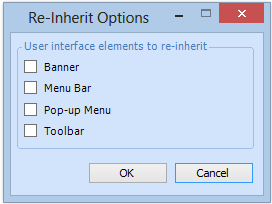
Re-inherit Toolbars for the Custom Class
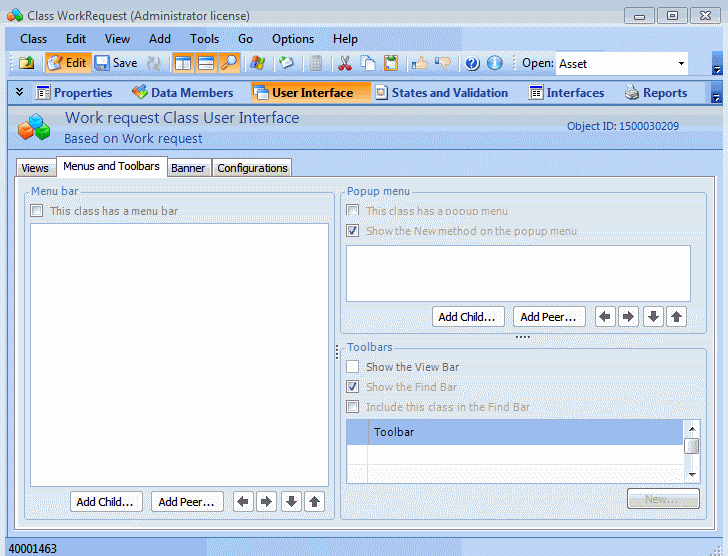
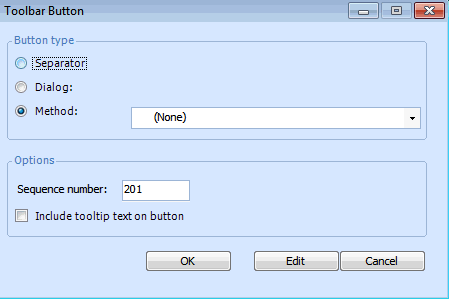
4.
5.
6.
From the Class menu, select Re-inherit User Interface. The Reinherit Options dialog appears.
7.
Select the Toolbar option and then click OK.
8.

Edit the Toolbars

9.
Select the Properties view, Menus and Toolbars tab.
10.
11.
To add a button click New.
The Toolbar Button dialog appears.
12.
Separator: adds a separator line to the toolbar
Method: adds a button that runs a method. When you select this option, you can select from any method available in the system.
Dialog: adds a button that opens a dialog. When you select this option, you can select any dialog that belongs to the class that owns the toolbar. For example, if the toolbar is on a site view, you can select any dialog owned by the Site class.
13.
14.

Test the Toolbar

You can now check the toolbar to see if it works correctly.
15.
16.