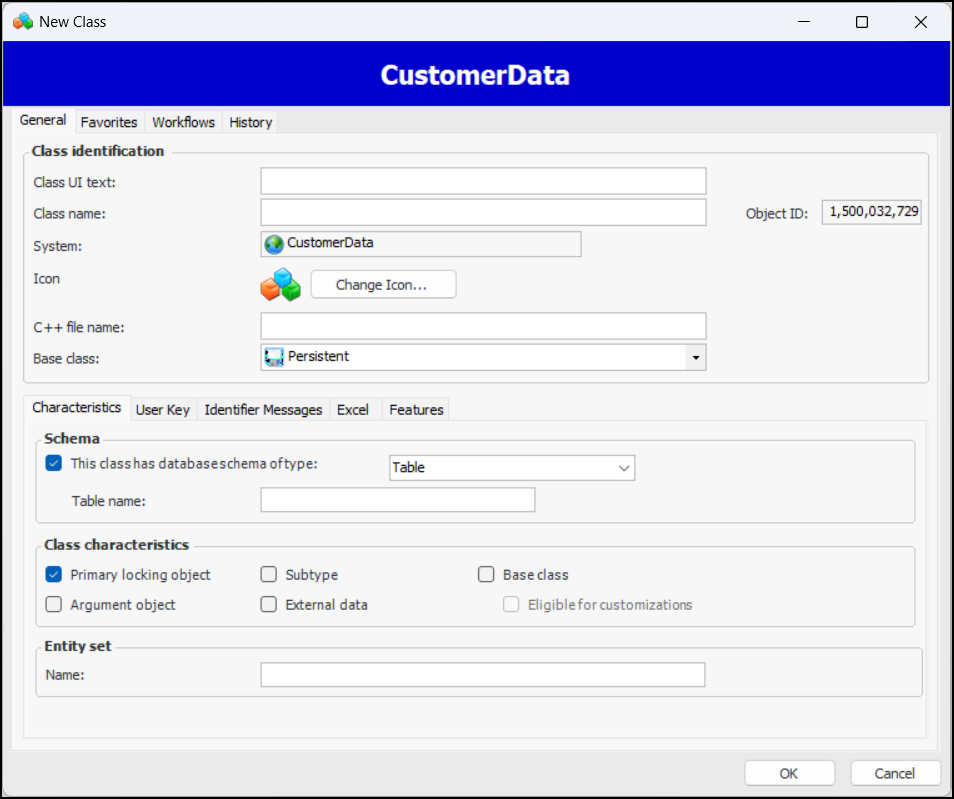
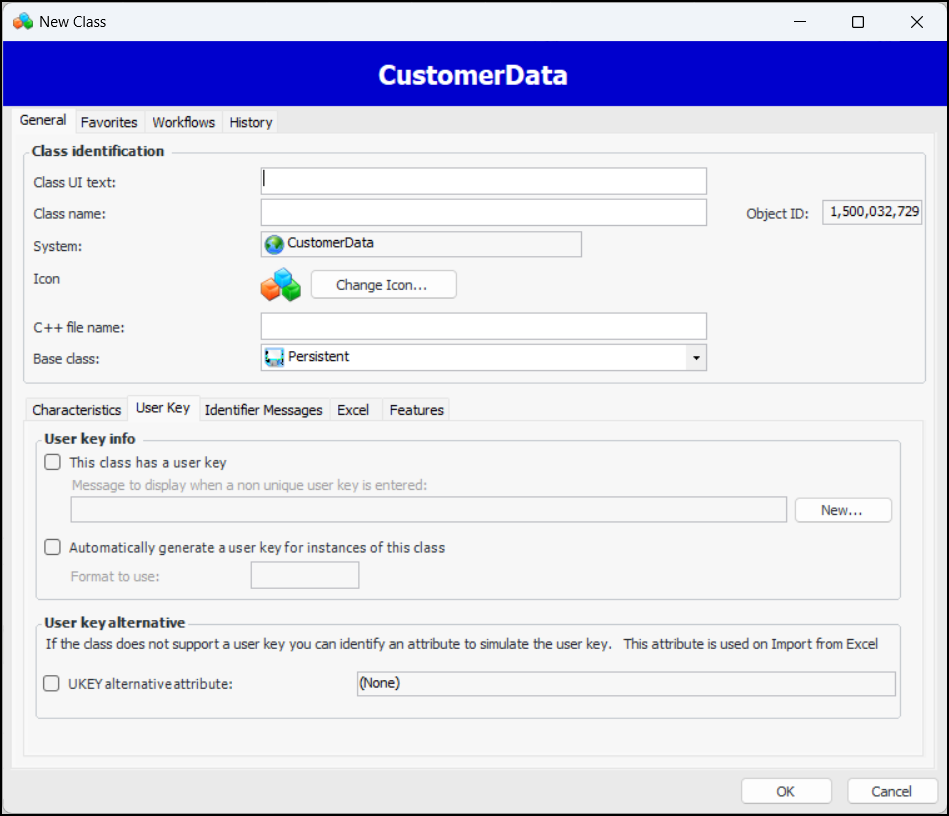
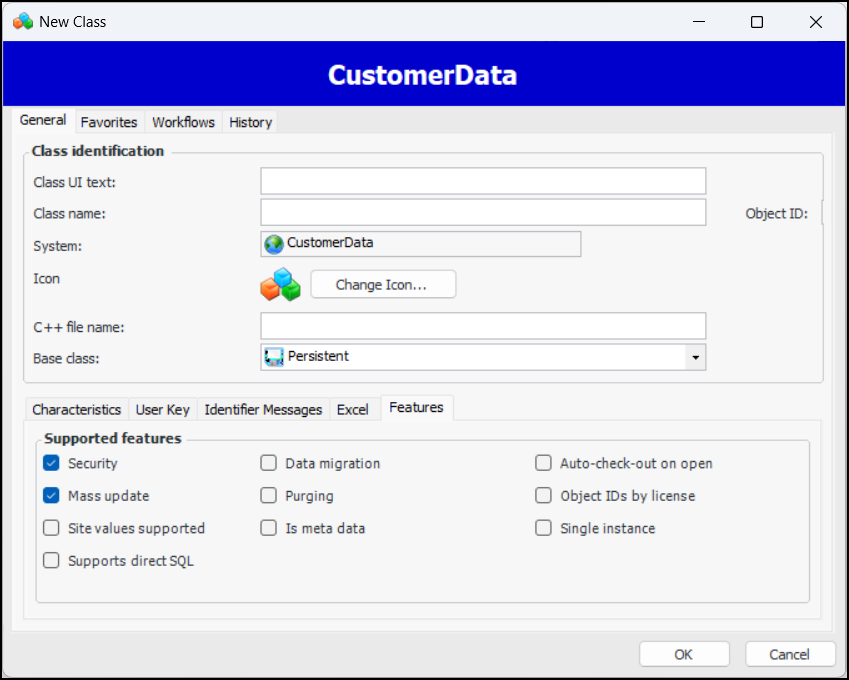
Adding a New Custom Class

Classes are the main building-blocks of the object model. A class is like a template for system objects that all have the same basic characteristics. The design of each class and how the classes relate to each other provide the basic structure of the application. All objects in APM are based on classes. Objects that behave the same way belong to the same class. For example, each asset in the system is based on the Asset class.
Sometimes you will need to add a completely new class to the CustomerData system. You might want to do this if none of the core APM classes meet the needs of the data you want to collect. For example, your maintenance organization might regularly use a form that has no equivalent in the core application. A custom class will provide a place to collect and store the information on the form.
Note: You must launch the product as an APM administrator.
This topic explains how to create a new custom class.

To Add a Custom Class

1.
2.
Select the Customization Center view.
3.
Click Lock for Customization.
4.
On the Classes tab, click New Custom Class and From Scratch. The New Class dialog appears.
5.
In the Class UI text box, enter a name for the class. Leave the Class name and Source file name boxes at the default settings.
6.
On the Characteristics tab, make sure that Primary Locking Object is selected.
7.
Select Base class if the class is a base class, then select Eligible for use in customizations if this class will be used as a base class for custom classes.
8.
Select the User Key tab and then select This class has a user key and Automatically generate the user key for instances of this class.
You are not required to enter a value in the Format to use field.
Tip: For more information about these options, press F1 on any field.
9.
Select the Features tab.
10.
Select each of the additional features you want to support, such as Mass update, Data migration, purging, auto-check-out-on open, and security.
11.
Click OK. The new class is added to the list of custom classes in the Customization Center.
12.
Note: All custom classes have as a data member a join path to the top parent class (the Site class). This means that relationships specified in the join path must be mandatory (null behavior is set to Error). Setting this join path ensures that date and time data is converted to the appropriate time zone, the correct site is selected when site security profiles are enforced, and that the correct currency is always selected for currency conversions (EAM module only). To set the join path to site, see Setting the Join Path to Site.
13.