|
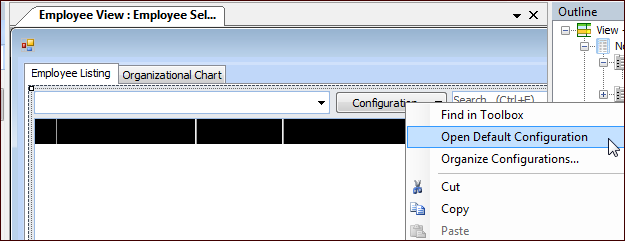
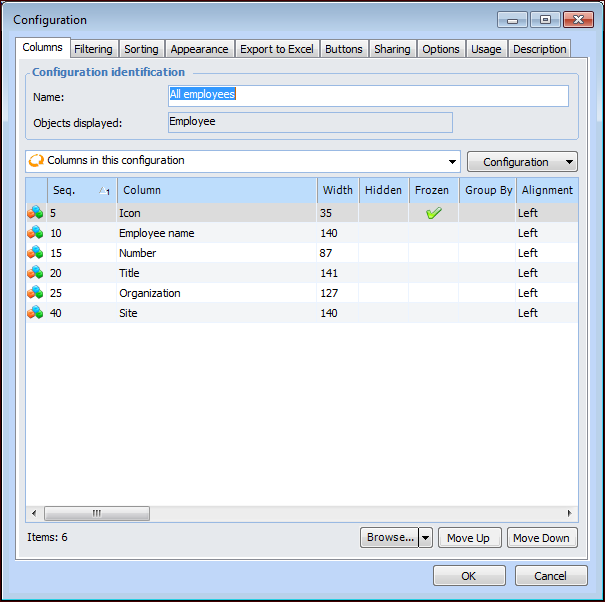
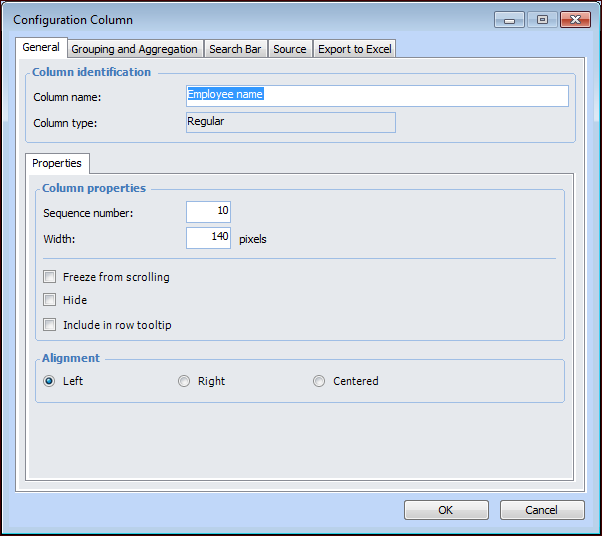
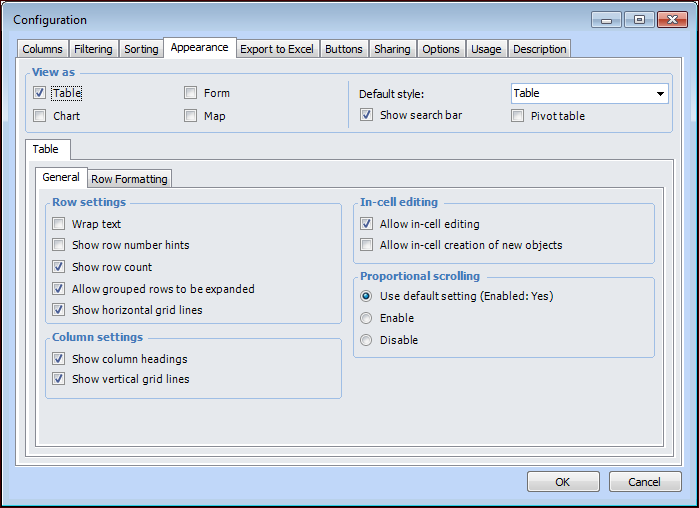
Adding a Table Configuration to a View
This topic explains how to edit the default table configuration in an existing custom view. You can perform all of the same functions as editing a table configuration through the user interface, including adding columns, filters and sorts, and custom buttons. To learn more about table configurations, see Table Configurations.To Add a Table Configuration to a View
2. On the Layout panel, right-click the table’s Configuration list and click Open Default Configuration. For example:
3. The Configuration dialog appears, displaying the Columns tab of the default configuration for the table. For example:
4. To add more columns to the configuration, click Browse. The Column Selector dialog appears.
9. Click OK to save your changes.
10. If necessary, you can change the order of the columns using the Move Up or Move Down buttons in the Configuration dialog.
11. To allow users to create new objects from this view, you need to include a New button in the configuration. In the Configuration dialog select the Buttons tab and then select Button 1 (New).
12. To add the Quick Search bar to the configuration, select the Appearance tab, and select the Show search bar option.
13. On the Appearance tab, set the View as options for the configuration. You can select Table, Chart, Form, or Map styles. Set the default style for the configuration.
14. On the Table tab specify the settings to apply for the configuration, when it is open in a table format. For more information, see Defining View as Table Appearance Properties.
15.
16. If you selected Chart as a view for the configuration, the Chart tab is added to the Appearance tab. Select this tab to define the chart settings. For more information, see Defining View as Chart Appearance Properties.
17. If you selected Form as a view for the configuration, the Form tab is added to the Appearance tab. Select this tab to apply form settings. For more information, see Defining View as Form Appearance Properties.
18. If you selected Map as a view for the configuration, the Map tab is added to the Appearance tab. Select this tab to apply map settings. For more information, see Defining View as Map Appearance Properties.
19. Tip: If you made changes to the configuration by right-clicking the column name and selecting filtering or sorting, or changing the column size, to save these changes you must right-click on the table and select Save Configuration.
21. To allow end-users to create their own configurations for this view, you need to include the Configurations UI. In the Outline panel, click the MultiColumnListBox control. Scroll down the list of properties in the Properties panel to the Behavior section and find Allow multiple configurations. Change the setting to True.