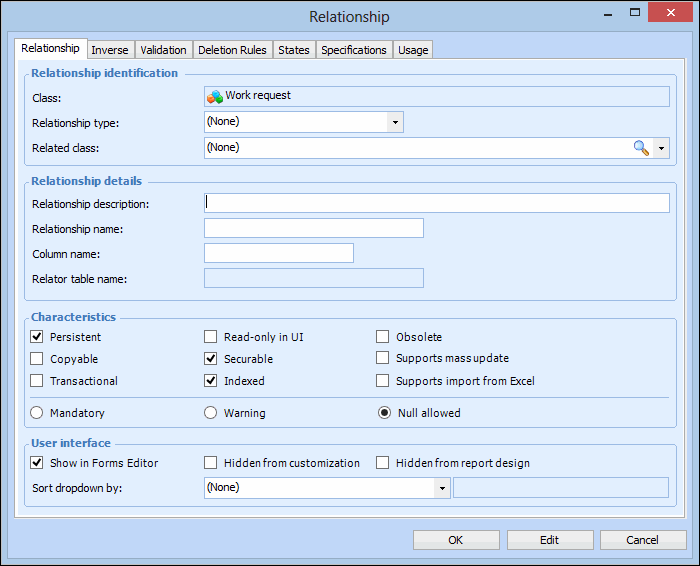
Adding a Relationship

A relationship defines the way one class is linked to another class in the object model. When objects are created from classes, they relate to each other based on the relationships set up between the classes in the object model. For example, the Asset class has an “owns many” relationship to the Functional Failure class. This means that when asset objects are created, they can own one or more functional failure objects.
There are several different types of relationships that you can choose from, and each relationship type will have different behavior. For more information, see Relationship Types.
Sometimes, you might want to show information from one class object on a view or dialog belonging to another class. In this example, you need to make a change to the Work Request primary window. Here are the requirements for the customization:
Work planners need to reference the asset’s warranty information on work requests. To perform this customization, you need to:
Note: You must launch the product as an APM administrator.
This topic uses the above example to explain how to add custom relationships to a class.

To Add a Relationship to a Custom Class

1.
2.
Select the Customization Center view.
3.
Click Lock for Customization. The APM icon in your Taskbar now has a key on it:
4.
If either class is not already customized, click New Custom Class then select Based on APM Class. Select the class, and then click OK.
For this example, you will create a relationship from the Work Request class to the Warranty class, and so you will need to ensure that you have custom versions of both of those classes.
5.
6.
Tip: You can view both APM and custom relationships or custom relationships only by changing the selection in the list at the bottom of the tab.
7.
Click New. The Relationship dialog appears.
8.
In the Type of Relationship box, select the kind of relationship that you want to create.
For this example, select References one.
For information on relationship types, see Relationship Types.
9.
In the Related class box, select the custom class to which this class will relate. Only custom classes are available for selection. You cannot create a custom relationship to a base class.
For this example, select the Warranty class.
10.
In the Relationship description box, type an appropriate description of the relationship. This is the text that will appear by default when you add the relationship to the UI.
For this example, type “Applicable Warranty”.
11.
If you choose the Mandatory option, the field is red-lined when left blank. An error message displays if the user tries to save or close the object when the field is blank.
If you select the Warning option, the system marks the field with a yellow-line and displays a warning message if the user tries to save or close the object when the field is blank.
12.
If you are working with a custom Indicator class, Supports mass update is available for Owns Many, References Many, References One, and Contains One relationships. Select this option if you wish to make the relationship available for mass update requests. Unless the relationship is References One, the Msg list appears.
You must create an informational message on the related class to display the value that will appear in the Values to Copy window of the Indicator Mass Update wizard. Then select the message from the list. For example:
The example above is taken from the Indicator class’ Owns Many relationship with the Calculation Input class. The informational message is on the Calculation Input class. The message arguments reference the Input Name (&1), Input Description (&2), and Input Type (&3). In the Indicator Mass Update wizard, the value to be copied might appear as “Input1 - Last Reading of Indicator A (Based on readings)”.
For more information, see Creating Custom Messages.
13.
On the Inverse tab, you can edit the relationship description and characteristics for the inverse part of the relationship. This determines the UI text and behavior of this relationship on the opposite class (the class at the other end of the relationship).
14.
On the Validation tab, Site Restrictions tab, you can set up site restrictions for the relationship. Enter the appropriate settings:
Note: You can also define custom validation rules and messages. For detailed instructions, see Creating Custom Validation Rules for Relationships.
15.
On the Deletion Rules tab, you can set the desired behavior for when an object from the custom class or the related class is deleted.
For more information, see Creating Deletion Rules for Relationships.
16.
On the Specifications tab, you can enter a detailed description of the relationship.
Note: On the States tab, you can review the state groups in which this relationship is included. To create custom states for the relationship, see Creating Custom States. On the Usage tab, you can review the views where the relationship appears in the user interface.
17.
Click OK to save the relationship.

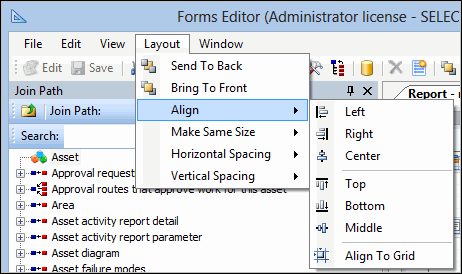
Adding the Relationship to the UI

18.
19.
Open the view to which you want to add the relationship. If the view has not yet been customized, click Customize, select the view or panel that you want to customize and a Customization type, and then click OK.
For this example, you will customize the Work Request Properties view.
The view’s Forms Editor Layout window appears.
If the view you are working with contains panels, you must turn on the Design this panel option. To do this, right-click the view and select Design this panel from the menu that appears.
20.
Find the relationship in the Toolbox panel, Relationships tab (for example, “Applicable Warranty”) and drag it onto the view. The type of control that appears on the view will depend on the type of relationship that you selected. For example, if it is a references one relationship, it will appear on the view as a label and a Browse button.
If it is a references many relationship, it will appear as an MCLB (table), and a dialog will appear allowing you to select the attribute to be used as columns in the table.
21.
Tip: To quickly arrange fields and/or labels in a window, you can use the Layout Options menu items. Select two or more items in the window and then select a layout option from the menu.
22.
Click the Browse button. The properties for the reference are detailed in the Properties panel. Expand the Data section.
23.
Click the box beside First Attribute. The dropdown list displays attributes that are available from the Warranty class. Select Title.
An empty box now appears beside the Browse button.
24.
The Browse button disappears. The field now has a down arrow on the right side.
25.
26.
27.
Move the Applicable Warranty field underneath the Hierarchy location field (in the Asset to Work on section of the General tab). To do this, you will first need to move some of the other fields down. You can also resize the Applicable Warranty field to match the sizes of the other fields in the view. When you are finished, the dialog should look similar to this:
28.
29.
In the Customization Center, click Unlock System. The system should automatically regenerate the schema and cache files. This may take a few minutes.
Note: If the system does not automatically generate the schema and cache, click Generate and then Schema, and Generate and then Cache Files in the Customization Center.
30.
Now you can test your customizations. Open the site and then navigate to your custom view. For example, select the site’s Work Request view and then open a work request. Make sure that Allow Editing is enabled. Your custom field should now appear on the Work Request window’s General tab. To test the field, click the down arrow and select a warranty. (Make sure that the asset to work on for the work request actually does have at least one warranty.)