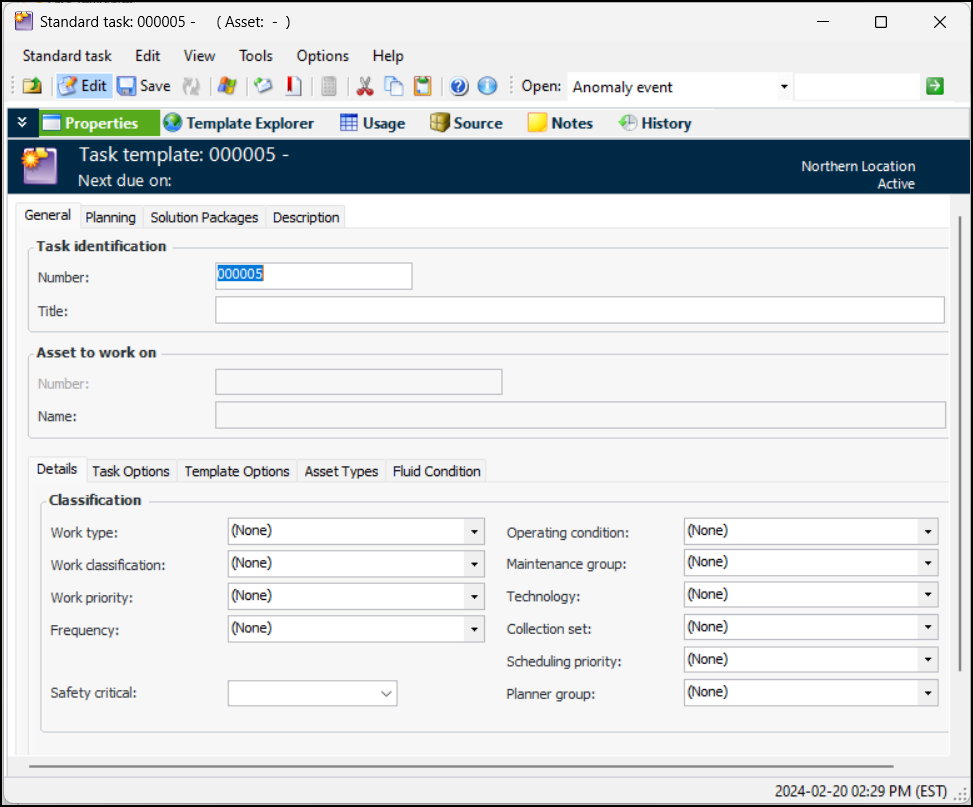
Creating a Task Template

Task templates are reusable plans that allow you to quickly create standard tasks for a group of assets. For example, you could set up a task template for taking the vibration readings on pumps. If the same standard task is performed on each of the pumps, using a task template simplifies the creation and maintenance of the individual standard tasks. You might define separate task templates for taking the vibration readings for engines and gearboxes.
The task template contains much of the same information that is defined on the standard task. This includes resource requirements for the task, specific indicators to be read, and the procedures and documents that are applicable to the task.
However, a task template does not identify an asset, while the standard task does. Task templates are intended for use with several similar assets, so you can add indicator templates to them. If the task template is only for use with one asset, there is no value in defining the task template; you can simply define the standard task from scratch. Similarly, you cannot set up dynamic routes on task templates, since routes are asset-specific.
When you set up a task template and then use it to create standard tasks, APM maintains a link between each standard task and the template. If you need to change the standard tasks later on, you can make the change once in the task template and then apply the changes to the standard tasks.
Tip: When a local task template has value for other sites, you can easily move it to a higher level site for use by sites lower in the hierarchy. In the Site window’s Reliability Program view, Task Templates tab, right-click one or more templates and click Move. In the Move Task Template dialog, the Site list displays only higher level sites with site types that support task templates.

Standard Tasks and Solution Packages (AWEIS)

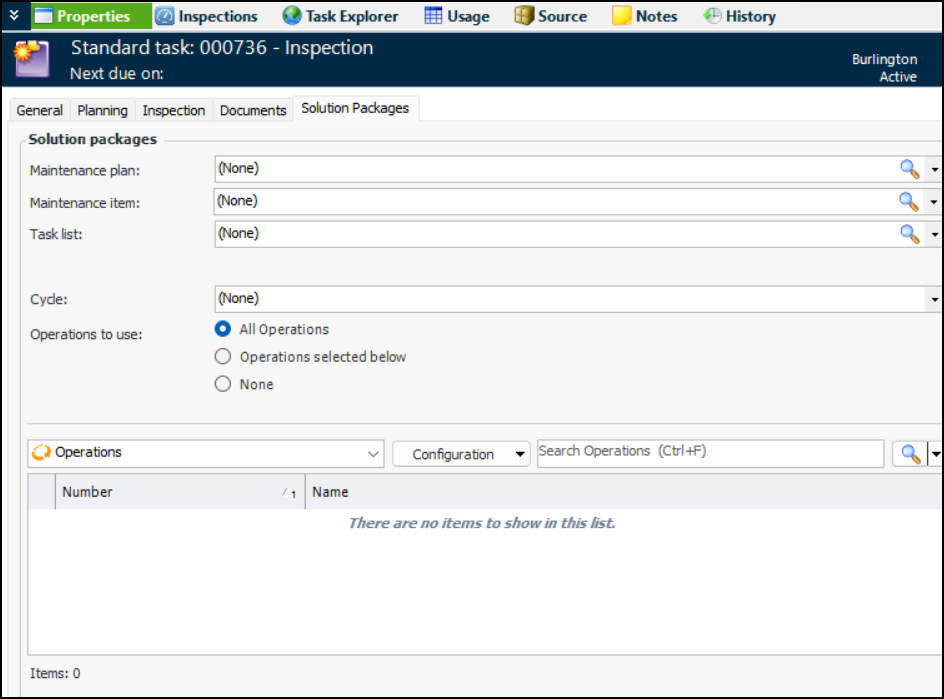
A standard task’s work type determines if solution packages can be identified on its Properties view, Solution Packages tab. Requests for work generated from the checksheets associated with the standard task are then used to trigger the correct solution packages in the CMMS.
Note: Support for solution packages on standard tasks is generally available in APM. You must first enable feature 119 to use the functionality in APM. In the Enterprise window, select the Features view and the Enabled Features tab. Click Browse, select “Solution package identification on standard task” and click OK. If APM is running as a smart client, click Refresh Enabled Features on the server. Then restart the client to use the functionality.
The names and relationships of solution package levels are set up in the Site Interoperability Profile. In this standard task, three levels have been defined: Maintenance plan, Maintenance item, and Task list. Steps have been defined as Operations.
Note that you can include solution packages that do not refer to an asset or that refer to the standard task’s asset. When setting up a standard task template, you can only include solution packages that do not reference an asset.

To Create a Task Template

1.
Select the site’s Reliability Program view, the Program tab, and then the Task Templates tab.
2.
Click New. The Standard Task window appears:
Note: The CMMS tab appears in the Properties view if integrations are active for the enterprise and site. For information about this tab, see the APM Integration Guide for the CMMS application you are using.
3.
Note: Standard tasks and task templates share a numbering system and each must have a unique identifying number. A standard task cannot have the same number as a task template.
4.
5.
On the Details tab, make selections or entries in the following boxes:
Note: When the work type is selected, the Checksheet Options tab is added to the Properties view, General tab.
The maintenance group that will work on the task. Select the appropriate maintenance group from the list. For example, you might select a mechanical group or an electrical group. APM uses this information to determine the GL account segment for labor charges, the default planner and scheduling options for a task, and to filter and sort lists of tasks for scheduling.
6.
Use the Triggering tab to prevent standard tasks from being triggered unless the asset, site, or both has a designated status. See Using Asset or Site Status on a Template to Prevent Task Triggers.
7.
On the General tab, select the Template Options tab.
8.
Match the template’s indicators to the indicators on the standard task asset and its descendants: If matching indicators are not found on the asset to work on or on the asset’s descendants, asset indicators are created on the asset.
Match the template’s indicators to the indicators on the standard task asset only: If matching indicators are not found on the asset to work on, asset indicators are created on the asset, regardless of what indicators exist on the asset’s descendants.
9.
To specify that the template must be used with specific asset types, select the Asset Types tab. Click Only available for use with the asset types selected below. The asset types are listed:
10.
11.
Select the Checksheet Options tab. On this tab, you can select a default checksheet type and up to three checksheet subtypes, if they have been created for your organization. If you assigned a checksheet type that supports inspection documents, you can click New to assign document types to use for inspection documents on checksheets.
The options are applied to checksheets created from the standard task.
12.
In the Checksheet restriction area, you can limit the standard task to having only one open checksheet at one time. Select Only one open checksheet allowed at a time. This functionality applies to the manual creation of an additional checksheet, not to checksheet generation, split checksheets, or checksheets created from a standard job.
13.
Select the Inspection tab and the Mobile Computing tab:
14.
15.
16.