|
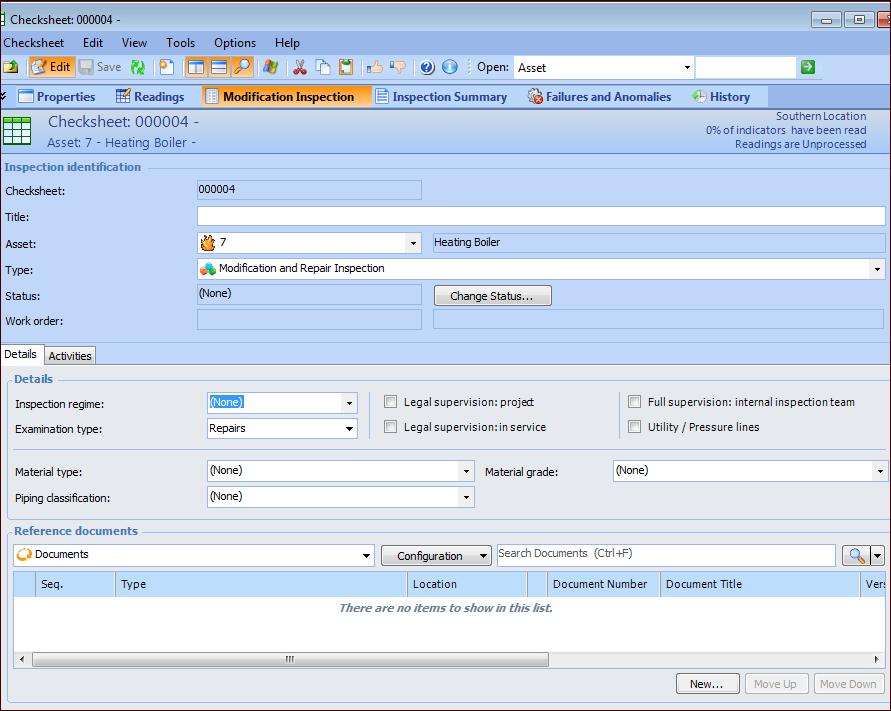
Preparing a Modification and Repair Inspection Checksheet
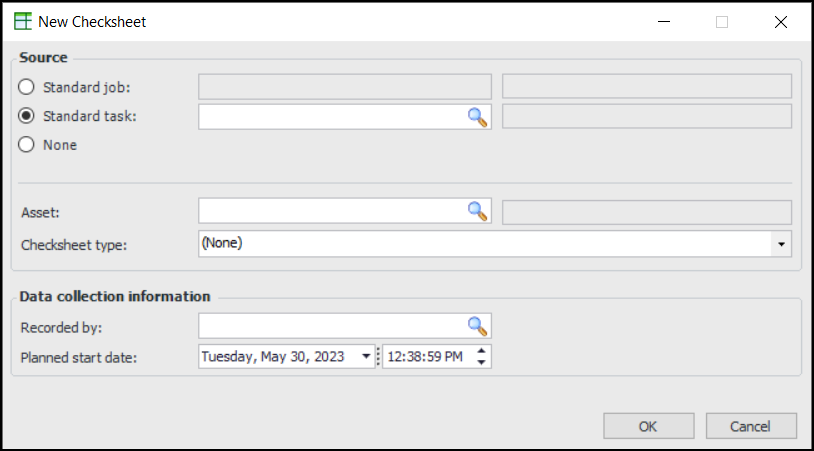
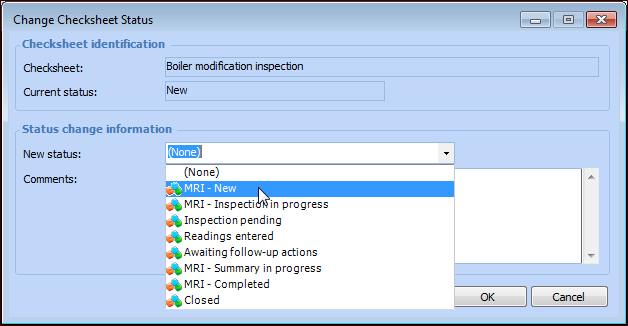
For information about updating and closing the MRI checksheet, see Completing a Modification and Repair Inspection Checksheet.To Create an MRI Checksheet
1. Select the site’s or asset’s Inspection Management view.
2. Select the Checksheets tab. This tab shows the checksheets for the site or asset.
3. Click New. The New Checksheet dialog appears. For example:If you created the checksheet from an asset, the Asset box displays the asset number and name.
• Select None to create an ad hoc MRI checksheet. This is the usual method for creating an MRI checksheet.
• To create an MRI checksheet from a standard task, select Standard task and click. The Standard Task Selector dialog appears. Select the standard task and click OK.
• To create checksheets for all of the tasks on a standard job, select Standard job and click. The Standard Job Selector dialog appears. Select the standard job and click OK.
5. If you created the checksheet from the site, the Asset box becomes available. You can browse for an asset, if needed.Tip: Alternatively, you can select Include modification and repair inspection in the Checksheet window’s Properties view. This adds the Modification Inspection view to the window. Select this view and the Activities tab to browse for activity types to add to the checksheet.
7. The Recorded by box displays your employee name by default. You can clickto open the Employee Selector dialog, listing only employees with the Inspector, data collection role. Select the employee to associate with the checksheet and click OK.
8. The Planned start date box shows the current date and time by default. You can change this information, if required.
9.
10.
• The New status list contains statuses that can be assigned manually. Select the status. For example:
• Provide additional information in the Comments box.
•
12.
• Select the SAP document and click OK. The document information is displayed in the Maintenance order boxes.
13. On the Details tab, fill in the information as needed:
•
•
• Click New. The Reference Document Properties dialog appears:
• Select the location of the document: Internal for standard documents stored in the APM database or External for documents stored outside of APM.
• For internal documents, click the browse icon () to open the Standard Document Selector dialog. Select the document and click OK. Provide the version and sheet numbers.
• Click OK. The dialog closes and the document is listed in the Documents table.
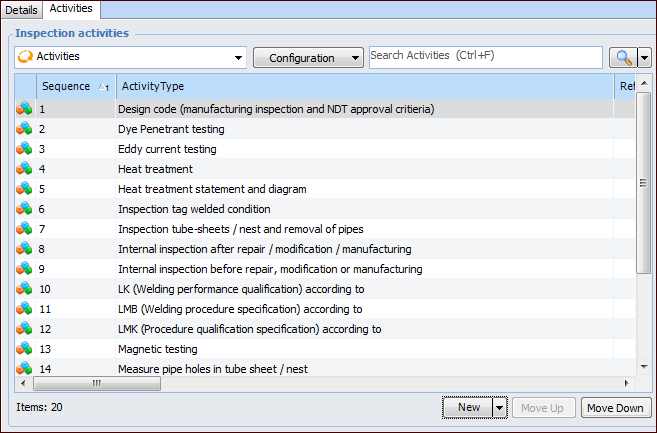
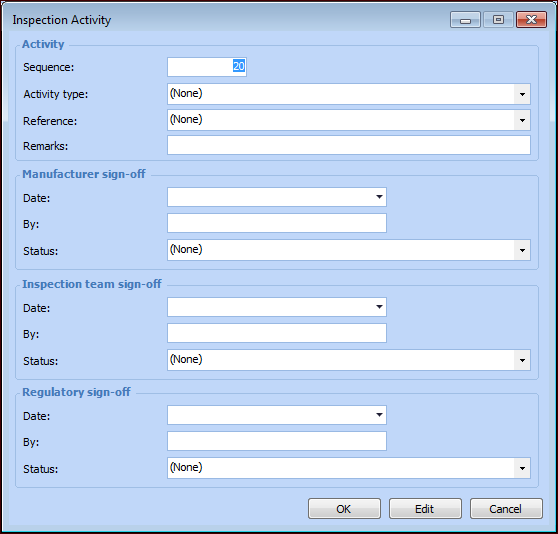
To Prepare Inspection Activities
1. In the Checksheet window, Modification Inspection view, select the Activities tab. This tab lists the activities provided by the checksheet type. For example:
2. To add an activity, click New. The Browse Inspection Activity Types dialog displays types that are not currently included in the checksheet. Select one or more types and click OK to add them to the Activities table.
3. If you need more than one activity of the same type, click the New list and then New. The Inspection Activity dialog appears:
• Click OK. The dialog closes and the activity is added to the Activities table.
4. You can change the order of the activities using the Move Up and Move Down buttons. APM updates the sequence numbers to match each activity’s position in the list.To Print the MRI Form
1. In the Checksheet window, click the Checksheet menu, point to Print, and click Modification and Repair Inspection. The Print Report dialog appears.
2. Click Print. The form is printed using the default printer.