|
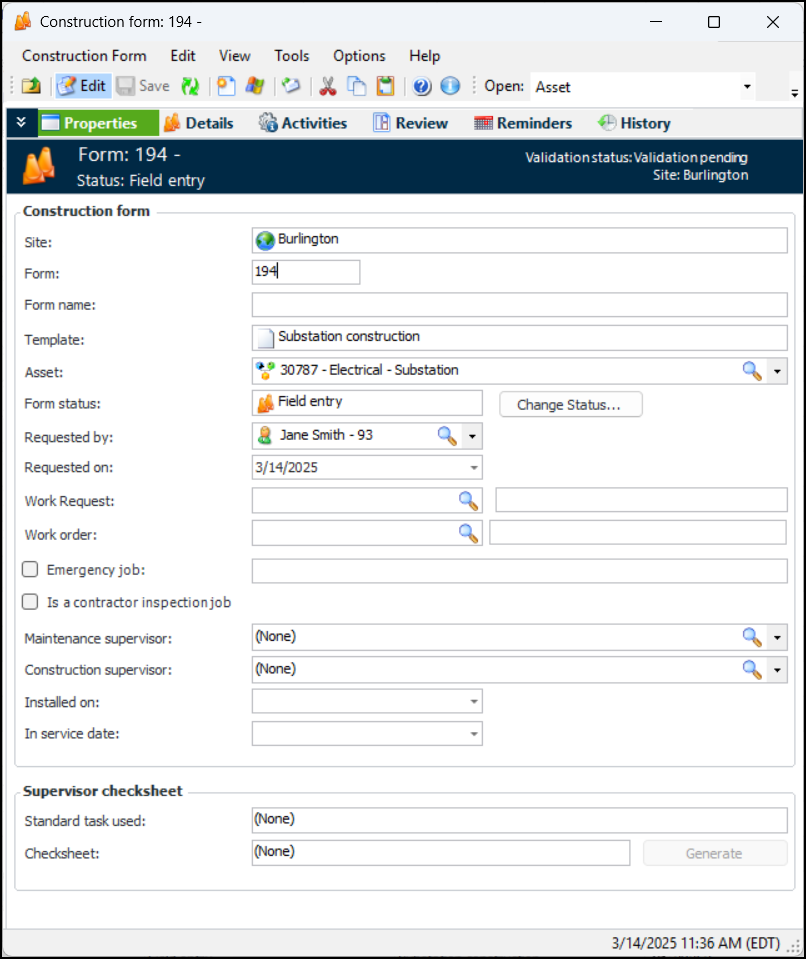
Creating Construction Forms
Construction Form Statuses
Asset Groups
Child Assets
Generated Details for Asset Descendants
Supervisor Checksheet
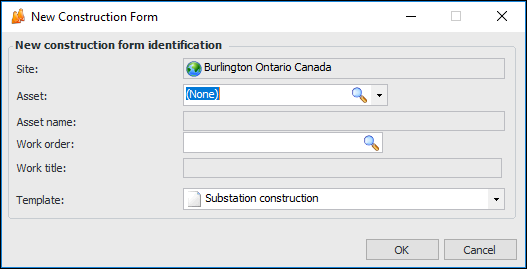
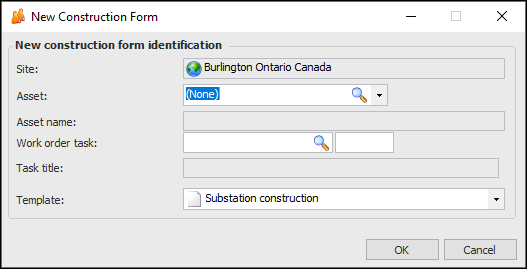
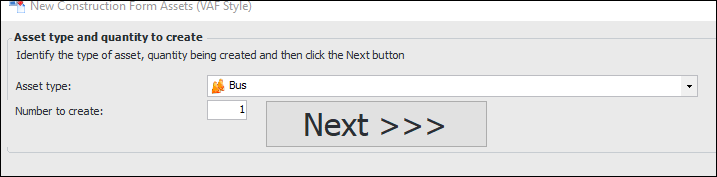
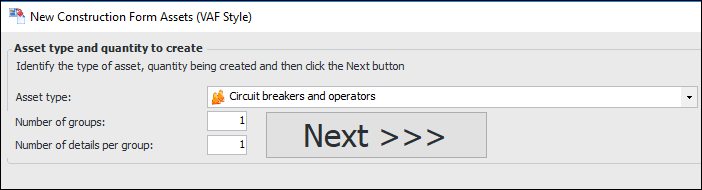
To Create a Construction Form
1. In the Site window, select the Construction Management view and the Construction Forms tab. By default, this tab lists existing forms for this site and below. You can use the options at the bottom of the tab to change the site filter.Tip: You can also open the Asset window, select the Construction Management view, and the Construction Forms tab. The asset information is shown in the form.
2. Click New. The New Construction Form dialog appears. This example appears when you are using AssetWise Enterprise Interoperability to exchange data with an external CMMS:
6. Click OK. The Construction Form window appears showing the Details view. Select the Properties view. For example:Tip: To replace the current status, click Change Status. The Change Construction Form Status dialog appears, where you can select a different status and enter comments. Click OK to close the dialog.
11. When the form status allows it, you can click Generate to manually create the supervisor checksheet. The names of the standard task and checksheet are then shown in the window.
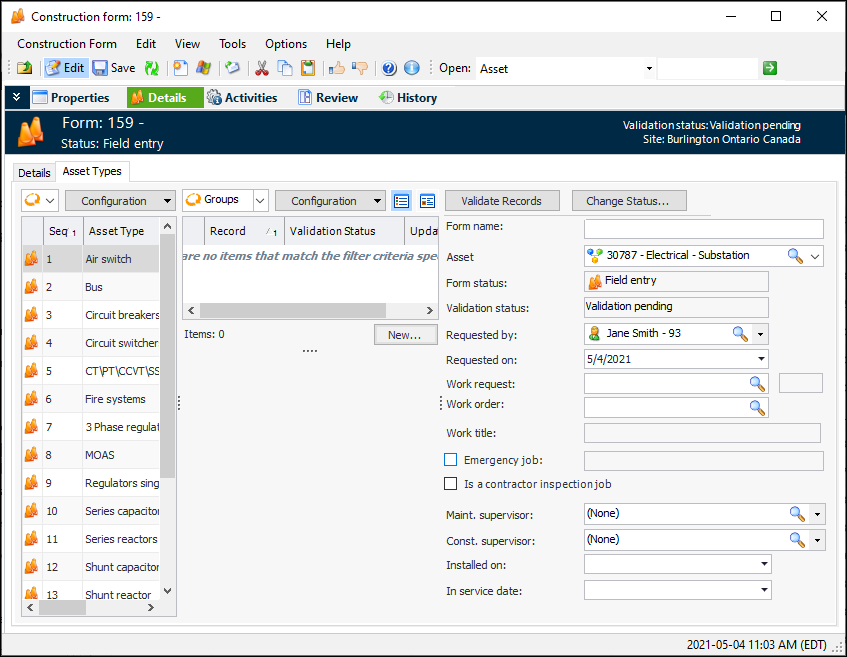
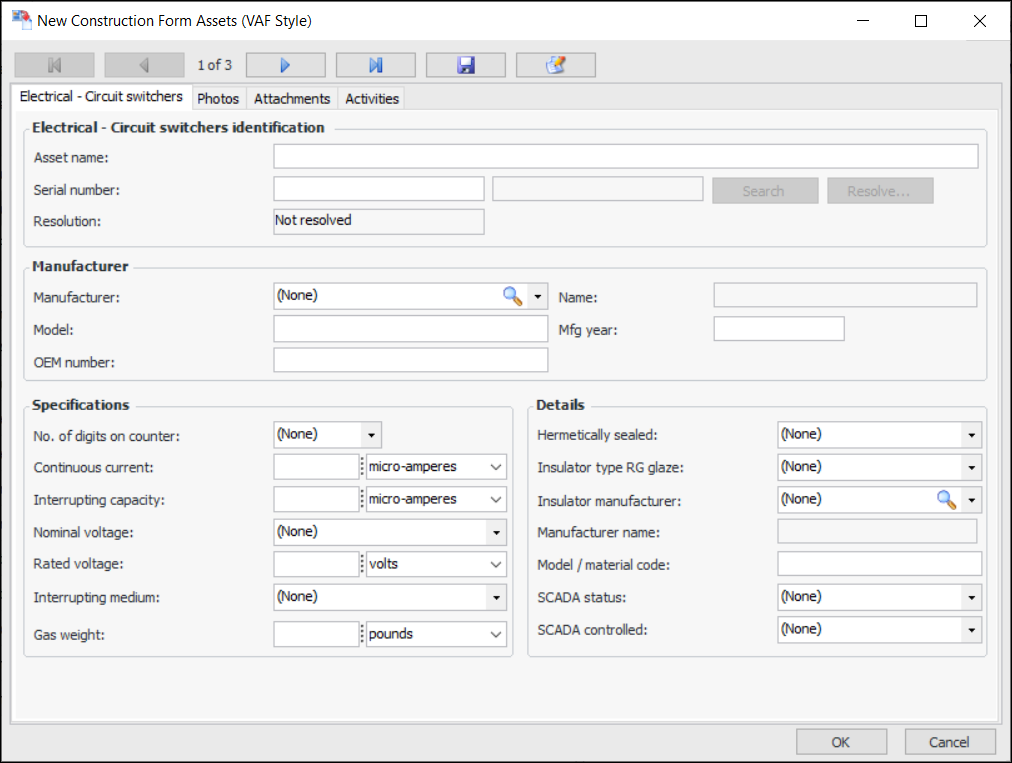
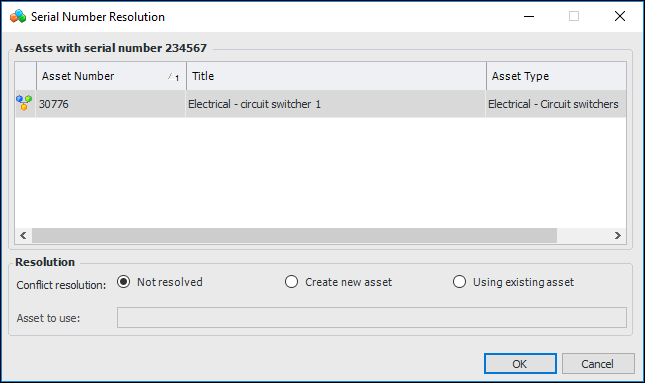
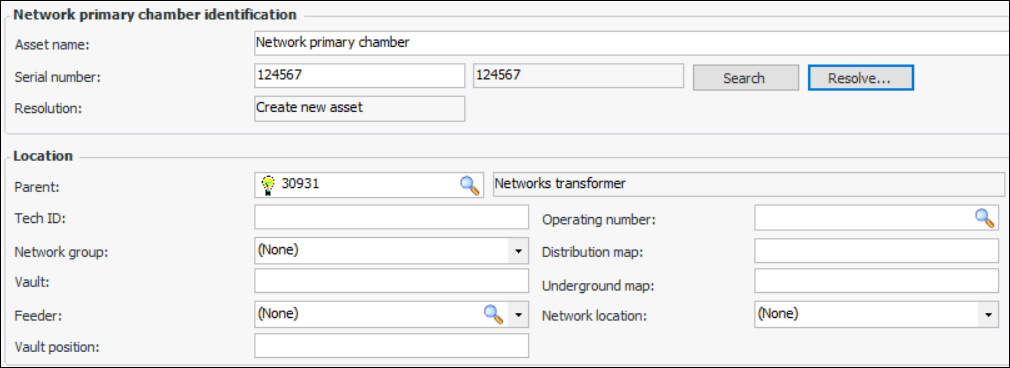
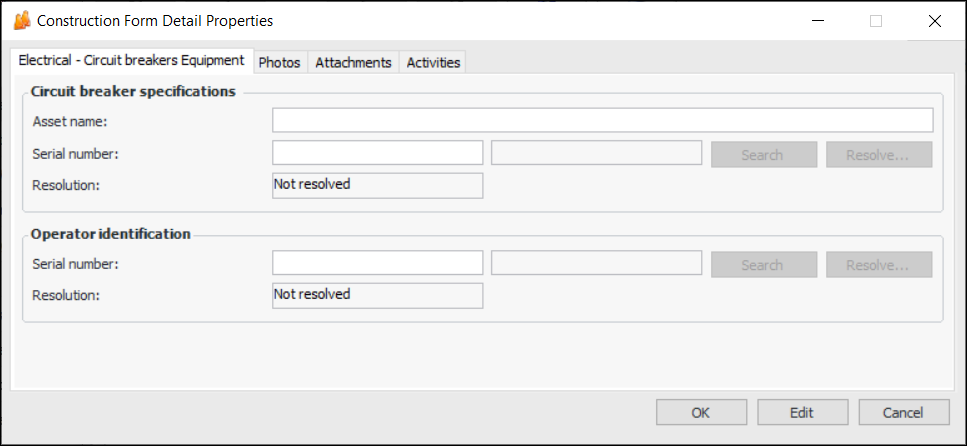
To Add Individual Assets to the Form
1. Tip: For more information about an asset type, double-click it in the table to open the Construction Form Asset Type Properties window. The Records tab lists the records that have been added to the form. The General tab shows, among other things, the name of the construction form template and the APM asset type on which the form asset type is based.
2. Select an asset type in the Asset Types table. Click New. The New Construction Form Assets window appears. For example:
3. Enter the number of assets of this type to create and click Next. On the next page, you can enter information about the asset(s). In this example, three circuit switchers are being added to the form:
• In this example, you would select Has Electrical - LTC. The Electrical - LTC tab is added to the window.
• To specify that you wish to replace or update the child asset only, you would select Only Electrical - LTC is being replaced. The fields in this tab (for the parent asset) are disabled, with the exception of the serial number or reuse asset search fields. Use the available method to identify the child’s parent asset, as explained in the next steps.
• Reuse asset – Select this option and click the browse icon. In the Asset Selector dialog, select the Asset Listing tab. This tab lists assets of the type you are adding. Select the asset and click OK.
• Serial number – Enter a serial number and tab out of the field. The Search and Resolve buttons become available. Click Search. Click Resolve to open the Serial Number Resolution dialog. For example:If the serial number search was successful, the matching asset is listed in the dialog. You can choose to either create an asset (and assign the serial number to it) or use the asset found by the search. Click OK. The Resolution box displays the result: “Using existing asset” or “Create new asset”.If you specified that only the child asset is to be replaced, Create new asset is not available in the Serial Number Resolution dialog. You must use the existing asset as the parent. Click Use existing asset and select the asset that was returned by the serial number search from the Asset to use list.
7. If the asset is a child asset, select its parent in the Location area and add information. For example:
8. Select the Photos tab to browse for photographs to add to the form.Tip: When assets have been created and updated for the construction form, their photographs will also be available on the site’s Assets view, Photos tab.
9. Click the Attachments tab to add a file, folder, note, or URL to the form. For more information, see Adding Attachments to Objects.
10. Click OK. The window closes and the records are added to the construction form.
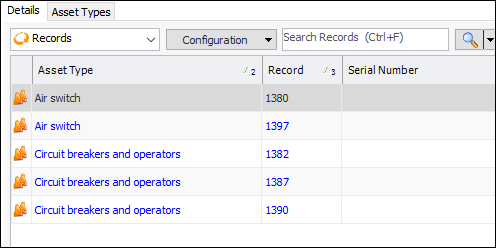
To Add Asset Groups to the Form
1. Tip: For more information about an asset type, double-click it in the table to open the Construction Form Asset Type Properties window. The Records tab lists the records that have been added to the form. The General tab shows, among other things, the name of the construction form template and the APM asset type on which the form asset type is based.
3. Click New. The New Construction Form Assets window appears. This example is for an asset type that supports groups:
5. Click Next. The next page displays general settings for the group. For example:
7. Select the Equipment tab. Double-click each new record to open its Construction Form Detail Properties window. For example:Tip: You can also add new assets, if needed. At the bottom of the Equipment tab, click New to open the Construction Form Detail Properties window.
• Reuse asset – Select this option and click the browse icon. In the Asset Selector dialog, select the Asset Listing tab. This tab lists assets of the type you are adding. Select the asset and click OK.
• Serial number – Enter a serial number and tab out of the field. The Search and Resolve buttons become available. Click Search. Click Resolve to open the Serial Number Resolution dialog. For example:If the serial number search was successful, the matching asset is listed in the dialog. You can choose to either create an asset (and assign the serial number to it) or use the asset found by the search. Click OK. The Resolution box displays the result: “Using existing asset” or “Create new asset”.If you specified that only the child asset is to be replaced, Create new asset is not available in the Serial Number Resolution dialog. You must use the existing asset as the parent. Click Use existing asset and select the asset that was returned by the serial number search from the Asset to use list.
9. Enter information for the asset. Select the Photos tab to browse for photographs.Tip: When assets have been created and updated for the construction form, their photographs will also be available on the site’s Assets view, Photos tab.
10. Click the Attachments tab to add a file, folder, note, or URL to the form. For more information, see Adding Attachments to Objects.
11. Click OK to close the window and save the record.
13. Click OK. The window closes and the groups and records are added to the construction form.Tip: In the Construction Form window, select the Details view and tab to view the group headers and their equipment details. If the asset type supports child assets, you will also see child equipment records. For example: