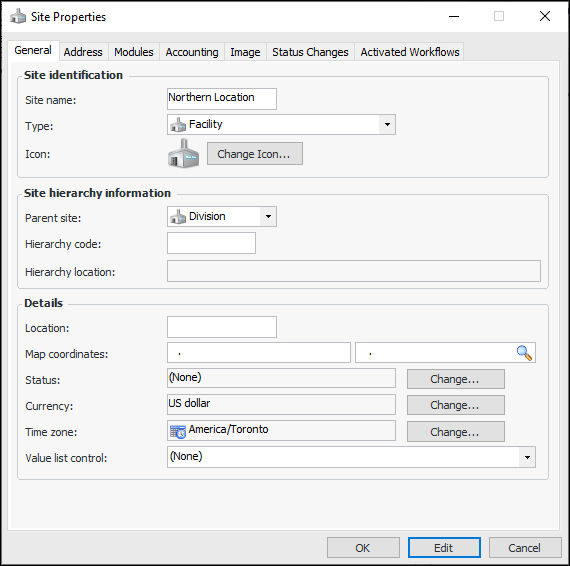
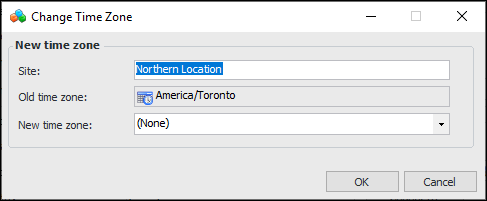
Changing a Site’s Time Zone

When the Time Zones by Site feature is enabled, you can assign a different time zone to one or more sites. Date and time data for the site is displayed in that time zone. If a site has not been assigned a time zone, APM ascends the site hierarchy to find a parent site’s time zone.
Wherever dates and times are displayed in smart and thick clients, the data is converted to the time zone assigned to the site (regardless of the time zone used on the computer).
Note: To enable site time zones, open the Enterprise window, select the Features view and the Enabled Features tab. Click Browse, select feature 9 “Time Zones by Site,” and click OK. If APM is running as a smart or remote client, click Refresh Enabled Features on the server. Then restart the client to use the functionality in the product.
For related information about time zones, see UTC, Enterprise Time, and Site Time Zones.

To Change a Site’s Time Zone

1.
In the Enterprise window, select the Sites view, Site Hierarchy tab.
2.
Right-click the site in the hierarchy tree and click Site Properties. The Site Properties dialog appears.
Tip: You can also open the Site window, click the Site menu and then Properties to open this dialog.
3.
Click Edit.
4.
Click Change next to the Time zone field. The Change Time Zone dialog appears:
5.
From the New time zone list, select the appropriate geographical area and city. APM uses the area’s time zone and intervals to display date and time information for the site.
6.
Click OK. When the dialog closes, the change is made for the site and becomes the default for child sites that have not been assigned time zones.