|
|


Working with Asset Notes
Note: The Asset Note functionality is generally available. You must first enable feature 58 to use the functionality in APM. In the Enterprise window, select the Features view and the Enabled Features tab. Click Browse, select number 58 “Notes support” and click OK. If APM is running as a smart client, click Refresh Enabled Features on the server. Then restart the client to use the functionality.
To Add a Note to An Object
To View Notes
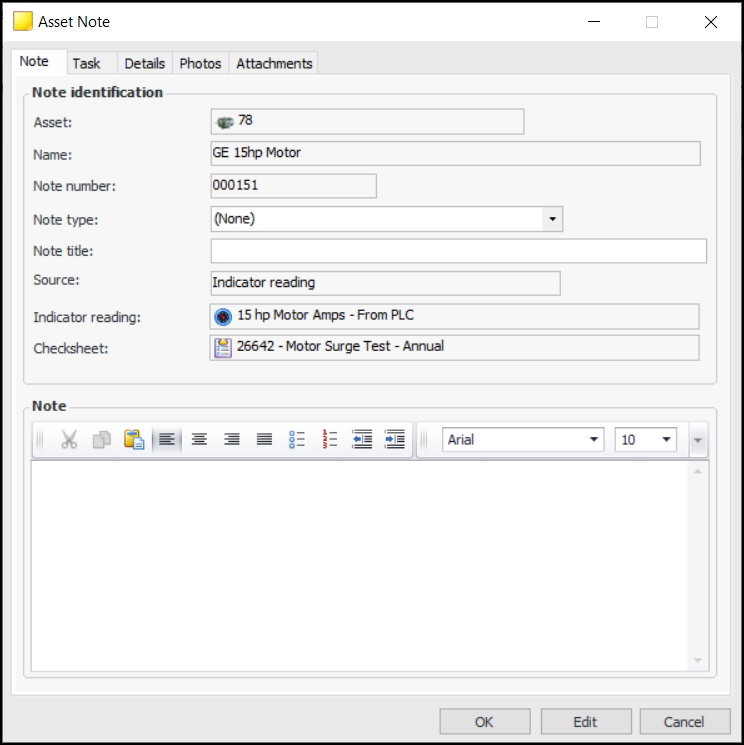
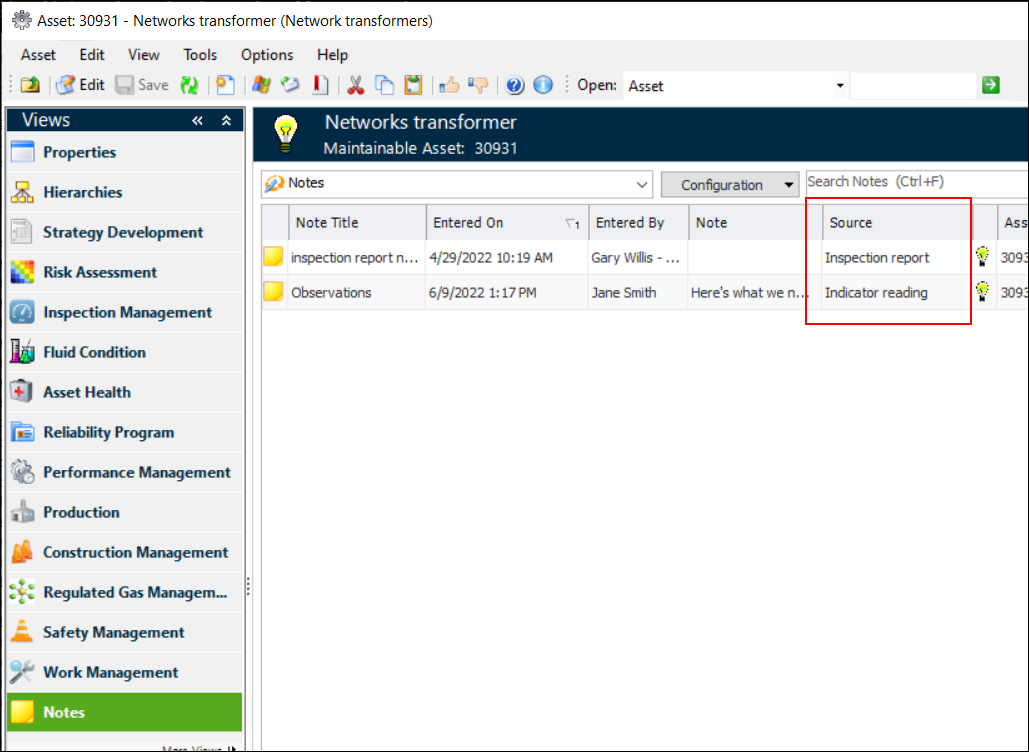
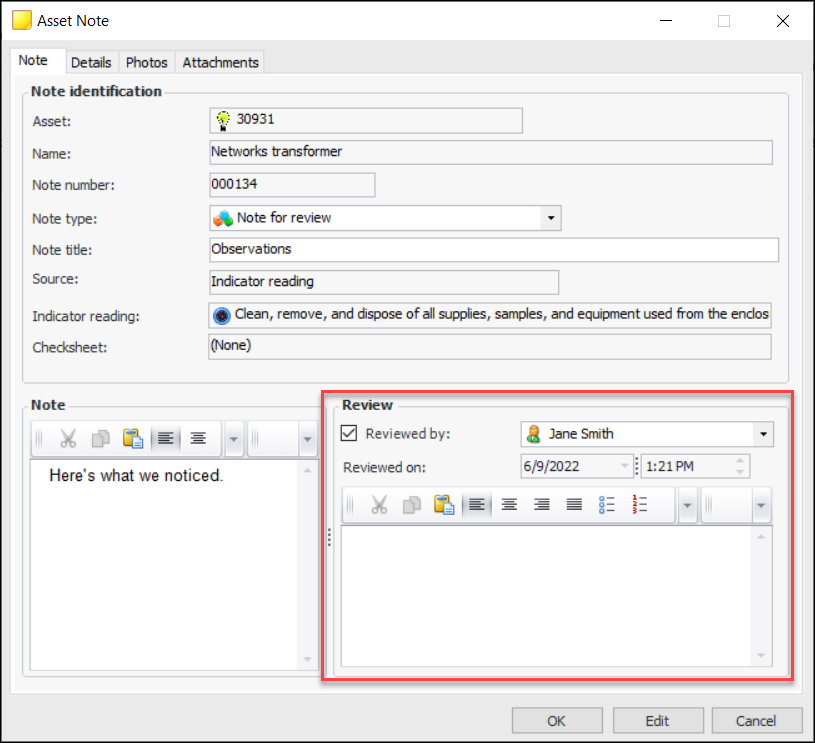
In the Site window, select the Assets view and the Notes tab to see all notes attached to assets. You can select the “Tasks” configuration to list the tasks assigned to notes.In the Asset window, the Notes view displays all of the notes attached to the asset and its related objects. The Source column indicates the objects with attached notes. For example:Other objects have either Notes views or tabs. For example, in a downtime incident, click the View menu and then Notes to see a table of notes. For objects with related assets, the view or tab offers two configurations: one listing the notes attached to the current object and the other listing notes attached to the object’s asset.To Mark a Note as Reviewed