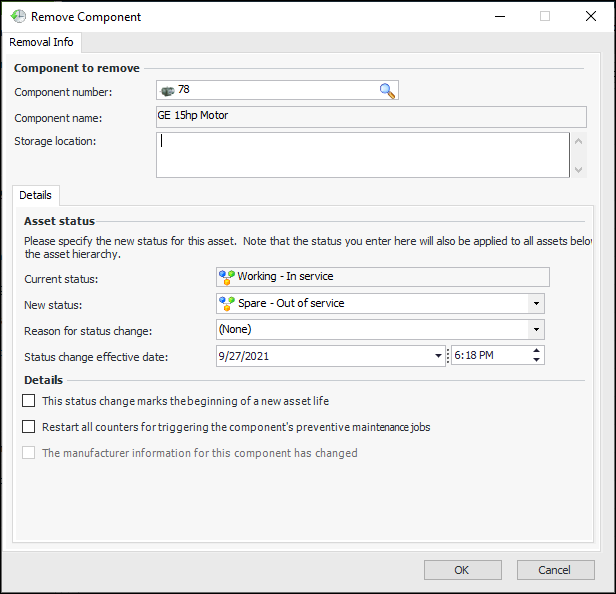
Uninstalling (or Removing) a Component

This topic explains how to uninstall components using the physical hierarchy. Typically, you will only do this when setting up APM data. When you actually swap components as part of doing maintenance work, you should plan the swap (install and remove) on a work order.
When you remove a component, you should ensure that you choose a proper status for it. For example, if you intend to install the component in a different location, it must have an asset status that is “available for use.” If the component is linked to a serialized resource unit, you should choose the appropriate unit status.
If set up for your site, the system can select a default status for the removed component. If necessary, you can change this status. The system can also set a default “empty” status for the location after the removal, if this default has been set for the site.
Note: If you remove a component that has an indicator in alarm, this alarm will need to be acknowledged separately for both the location and the component.

To Uninstall a Component

1.
On the Site window, select the Assets view and then the tab that shows your physical hierarchy.
2.
3.
Right-click the component location and then click Remove Component. The Remove Component dialog appears.
4.
In the Storage location box, enter a description of the location where you are putting the component.
Select a new status for the component. If the component is linked to a serialized unit, select the New unit status. For example, you can select the Uninstalled unit status. This unit status is linked to an appropriate asset status, which is displayed in the dialog.
If the component is not linked to a serialized unit, select a new status from the New asset status list. For example, if the component is being removed for repair, you might want to change it from an operational status to a non-operational one.
5.
Select a reason for the removal in the Reason for status change box.
6.
The manufacturer information for this component has changed becomes available for section. If you click it, the Manufacturer Info tab is now available, and the asset’s manufacturer information can be edited. Select the Manufacturer Info tab. You can enter the manufacturer, model, OEM number, expected life, year of manufacture, and so on.
7.
To tell APM to restart the counters that trigger work orders from standard jobs, select Restart all counters for triggering the component’s preventive maintenance jobs. When you select this option, APM asks you to confirm your selection. To restart the counters, click Yes. To cancel, click No.
8.
To remove the component, click OK. APM removes the selected component and moves it to the hierarchy’s holding area asset.
9.