|
Setting up Asset Program Profiles
Tip: In the Asset Program Profile window, the Generate Asset Program command is available in the Tools menu. Be cautious with this command. It is typically used after you have added a detail or adjusted filters in an established profile. You can then use the command to update assets with existing programs.Note: Asset program profiles are generally available in APM. You must first enable feature 27 to use the functionality in APM. In the Enterprise window, select the Features view and the Enabled Features tab. Click Browse, select “Asset program profile” and click OK. If APM is running as a smart client, click Refresh Enabled Features on the server. Then restart the client to use the functionality.Components of an Asset Program Profile
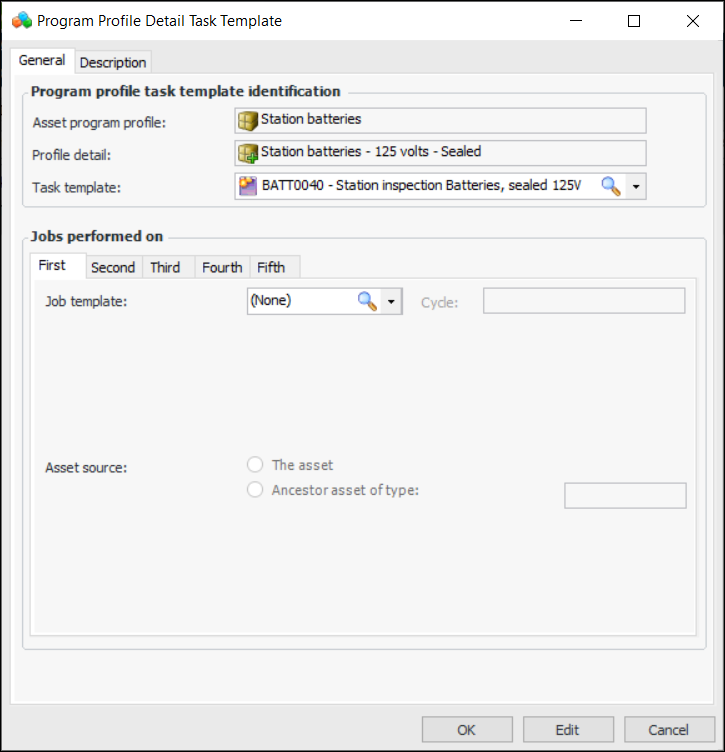
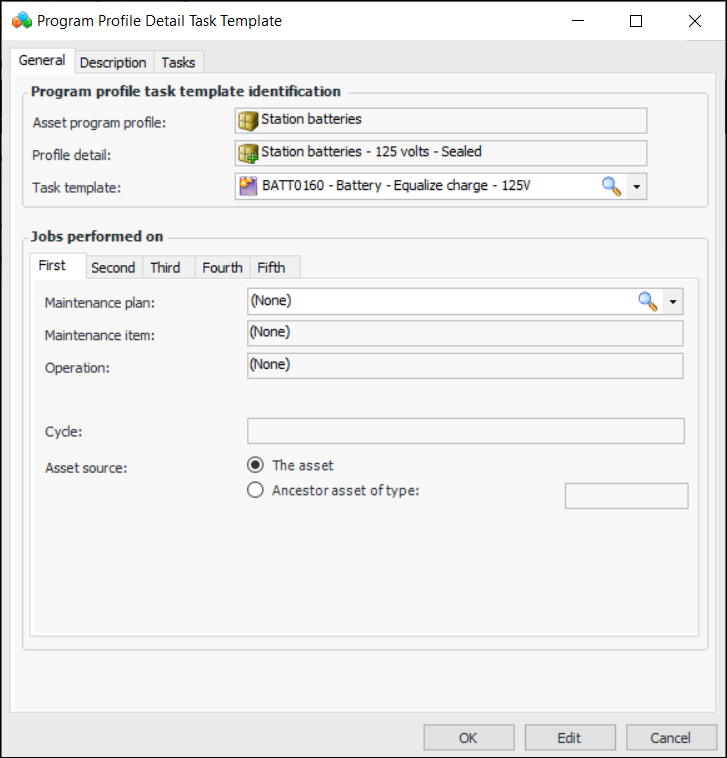
APM Job Templates
Interop Solution Package Templates
Viewing Objects Created from Program Profiles
• On the Site window, select the Assets view, Program Profiles tab. The Indicators and Tasks tabs provide table configurations for viewing either objects generated in the last seven days or all objects
• In the Asset Program Profile and Asset Program Profile Detail window, select the Usage view to see tables of the indicators and tasks created from the profile or detail, respectively
• Objects created directly from the profile’s task templates, job templates, and indicator templates display the source in their windows. For example, the Usage view in the Indicator window provides the Program Profiles tab
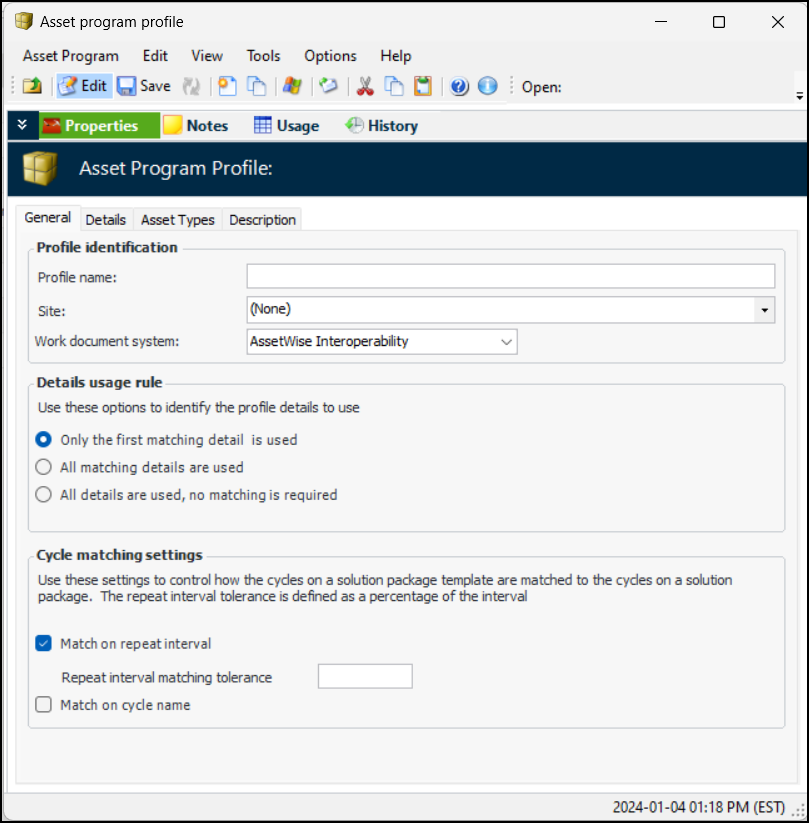
To Set up an Asset Program Profile
1. On the site’s Assets or Construction Management view, select the Program Profiles tab and the Profiles tab. This tab lists the profiles for the site.Tip: You can also add profiles on the Asset Type window. Select the Program Profiles tab. Select Asset program profiles and generation are supported for this type of asset. Click New and select an existing program profile in the dialog. Click to OK to close the dialog.Tip: You can mark profiles as inactive to prevent them from being used until they are ready. Select the profile in the table and click Mark as Inactive. When the profile is ready for use, select it and click Mark as Active.
2. Click New. The Asset Program Profile window appears. This example is for the AssetWise Interoperability work document system:When the work document system is APM, the Cycle matching settings do not appear.
Note: The Work document system box displays the master system that owns work documents. Possible values are:
• Only the first matching detail is used – APM compares each asset to profile details in sequence number order. The first matching detail is used to update the asset
• All matching details are used – Assets that meet the criteria in more than one of the profile details are updated with the matching details’ objects
• All details are used, no matching is required – All assets are updated with all of the details’ objects
4. In the Cycle matching settings (available when the work document system is AssetWise Interoperability), use the settings to control how the cycles on a solution package template are matched to the cycles on a solution package:
When Match on repeat interval is selected, you can modify the default matching tolerance, which is 5% of the repeat interval. For example, if the template interval is 12 months and the tolerance is 5%, the process searches for a cycle with a frequency greater than or equal to 342 days and less than or equal to 378 days.
5. Select the Asset Types tab. This tab lists the asset types that are linked to the profile.Note: Be sure to add any asset types that you intend to include in the profile details’ filter criteria.
6. For each asset type that you wish to add, click New. The Asset Type Asset Program Profile dialog appears:
7. Select the asset type, provide a note, and click OK. The dialog closes and the asset type is added to the tab. The APM asset type is updated with a reference to the asset program profile.
8. Select the Description tab to add more information.
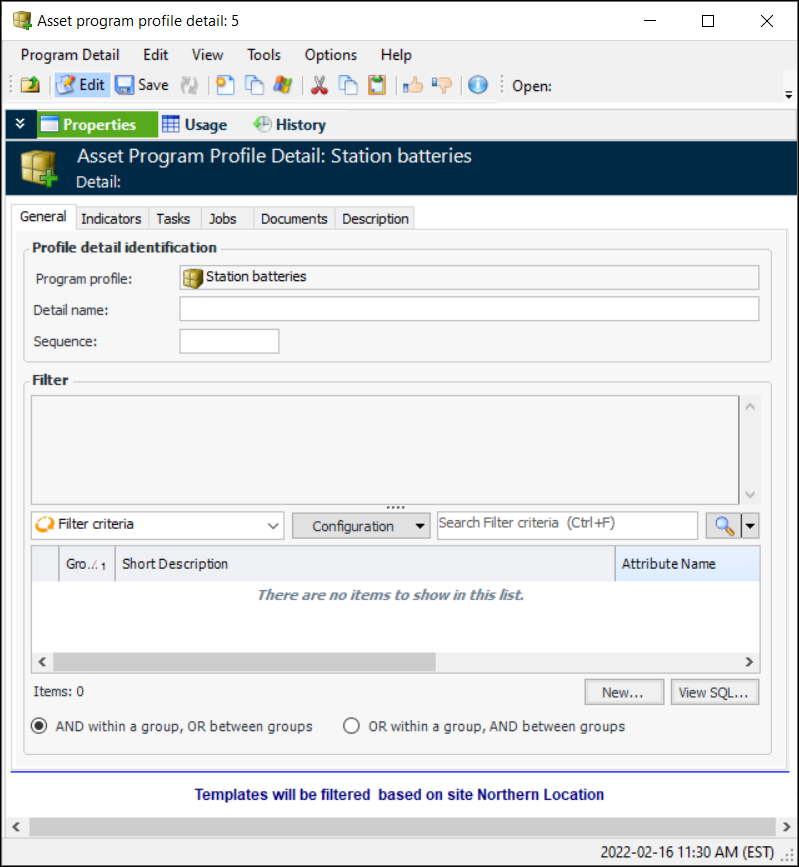
To Define Asset Program Profile Details
1. Tip: You can mark profile details as inactive to prevent them from being used until they are ready. Select the detail in the table and click Mark as Inactive. When the detail is ready to be used, select it and click Mark as Active.
2. For each detail that you wish to add, click New. The Asset Program Profile Detail window appears:Note: When the work document system is AssetWise Interoperability, the Jobs tab is not available in this window.
6. Select the Indicators tab to create or select indicator templates. The generation process checks whether the asset already has an indicator of that type. If it does not, APM creates the indicator and adds it to the asset.
7. Select the Tasks tab to create or select task templates. The generation process checks whether the asset already has a standard task of that type. If it does not, APM creates the task and adds it to the asset.
•
• The Cycle list is populated with the triggering cycles defined in the standard job template. Select a cycle to align the generated standard task with the job’s cycle.
•
• The Cycle list on each tab is populated with the triggering cycles defined in the solution package template. The site’s interoperability profile determines the solution package level for which cycles are displayed. Select a cycle to align the generated standard task with the solution package’s cycle.
9. When you have finished, click OK to close the window.
10. If the work document system is APM, you can select the Jobs tab to add standard job templates. The generation process checks whether the asset already has a standard job of that type. If it does not, APM creates the job and adds it to the asset.
11. Select the Documents tab to select standard documents.
12. Select the Description tab to add more information.