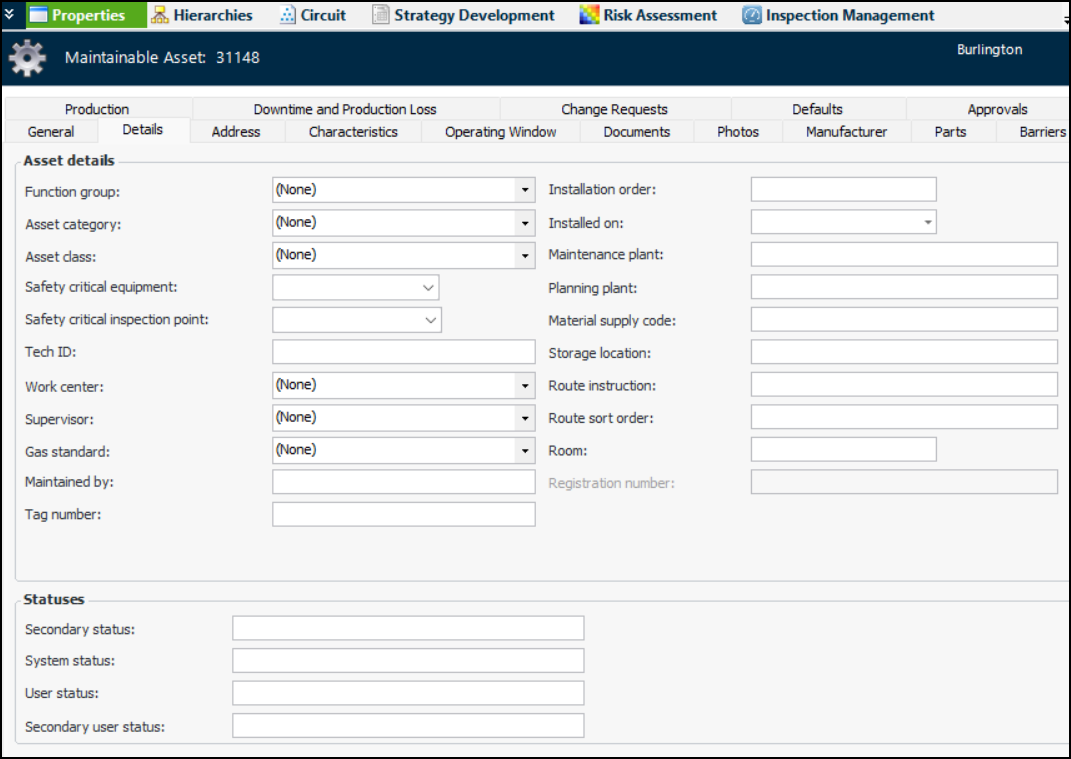
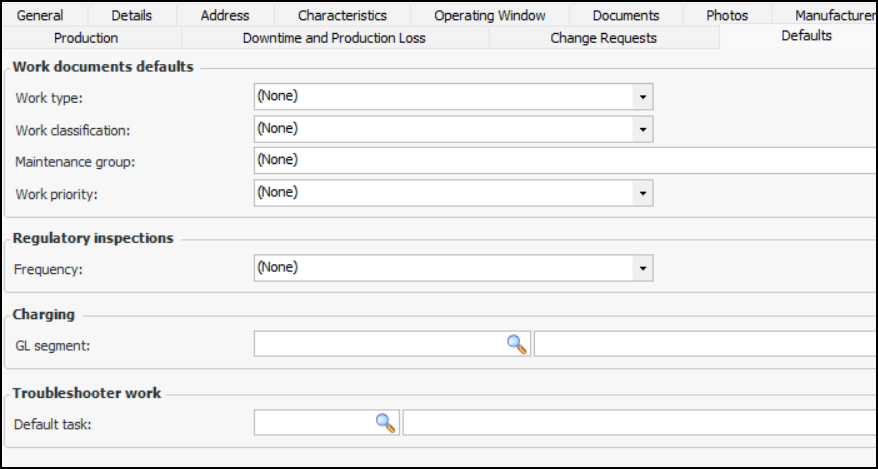
Creating a Maintainable Asset

A maintainable asset is a piece of equipment or system for which you track work, costs, and condition. For example, tanks and pumping systems are maintainable assets. You can repair maintainable assets, but they are not swapped in and out of a location and they are not disposable when they break (like spare parts).
This section describes how to create a basic maintainable asset and provides links to more advanced tasks.

To Create a Maintainable Asset

1.
From the Site window, select the Assets view and then the Physical Hierarchy tab.
2.
Tip: When you create assets from the hierarchy, APM automatically fills in the parent information. You can also add assets from the Listing tab by clicking New. With this method, you must add the parent asset information.
The Asset window opens, showing the Properties view, General tab. For example:
Note: The CMMS tab appears in the Asset window when the Work Management Integration module is licensed and activated. For information, see the guide for the APM CMMS Integration plug-in you are using.
3.
On the General tab, identify the asset:
Note: When the type is selected for an asset, the number of tabs displayed changes based on the type’s settings and classification. For example, for asset groups, you need only fill in minimal information, whereas for maintainable assets, you will need to provide more information.
A tab for each subtype is added to the asset’s Properties view, where you can enter additional information about the asset.
4.
In the Classification area, provide the following information:
5.
The Vault Info tab is available if the asset type is for electricity transmission and distribution networks. For example:
6.
On the Location tab, enter the following information:
Tip: You can click the browse icon and point to the location on a map to have APM assign the coordinates. For more information, see Setting Map Coordinates.
7.
Select the P&ID tab to reference a piping and instrumentation diagram on the asset. In APM, P&IDs are included with standard documents and can be added to assets and safety provisions for reference.
8.
If asset age is recorded for the site, the Age tab displays the asset’s age (in years) and remaining life expectancy.
For more information about setting up asset age calculations, see Setting up Asset Age Calculations.
9.
Select the Spare Part tab if you wish to link the asset to a resource.
None: This asset is not a spare part and is not linked to an inventory resource.
Spare part: The asset is linked to a non-serialized resource. Maintainable assets can be linked to tool resources. Components can be linked to material resources.
Serialized spare part: This asset is linked to a specific serialized inventory resource unit. Maintainable assets can be linked to serialized tool resources. Components can be linked to serialized (repairable spare) material resources. If you select this option, you must also select the specific unit to link to the asset. The status of the asset and the unit must match or you will not be able to link them.
10.
If you are using additional hierarchies, you can select the Alternate Hierarchies tab to establish the new asset’s position in it. This tab lists all of the hierarchies defined for the enterprise. For example:
Click a browse icon to select the parent asset in the alternate hierarchy.
11.
If the asset type allows it, you can select the Circuits tab and add the asset to as many as 10 circuits. For more information, see Working with Asset Circuits.
12.
Select the Description tab to add general information about the asset.
13.
Select the Process Description tab to describe the process taking place in the asset. For example, enter a degradation-focused summary of the movement of fluid through a corrosion loop.
14.
The Degradation Description tab is available if the asset type supports degradation descriptions. Provide a description of the potential degradation mechanism in the asset or corrosion loop.
15.
Select the Details tab and select the appropriate values:
Value lists can be set up in APM for:
16.
17.
If the Address tab is available, select it and enter the appropriate information.
18.
The Characteristic list is populated based on the asset type. Select a characteristic from the list. For example:
For related information, see Setting up Characteristic Mapping for Assets.
19.
If the asset type allows operating parameters to be recorded for the asset, select the Operating Window tab. The parameters describe the asset’s designed and actual performance, including unit of measurement, maximum and minimum measurements, measurement frequency, and indicators used to track parameters.
For more information, see Adding Operating Parameters to an Asset.
20.
Select the Documents tab to add standard documents. For more information, see Adding Documents to an Asset.
21.
22.
Select the Photos tab and then click Browse to select inspection photos to be included with this asset.
23.
Click Open Folder to view the location.
Tip: You can also drag and drop photo files into the table.
24.
Select the Manufacturer tab to add information about the purchase and manufacturer of the asset. For more information, see Adding Purchase and Manufacturer Information to an Asset.
25.
Select the Parts tab to add a spare parts list. For more information, see Creating a Parts List for an Asset.
26.
If the asset type allows barriers to be recorded for the asset, select the Barriers tab. A barrier is a means of slowing or mitigating asset degradation. For example, coating, lining, and chemical treatment are used to slow corrosion in metal piping. For more information, see Adding Barriers to an Asset.
27.
Advanced production loss accounting: the Production tab is available. Select it to assign products and calculations to the asset
Basic production loss accounting: the Downtime and Production Loss tab is available. Select it to set downtime and lost production options.
For more information, see Setting up Production Loss Rules on an Asset.
28.
Select the Defaults tab to choose default selections for the asset’s work documents, regulatory inspections, and so on. For example:
 
29.
30.
Select the Approvals tab to view and select approval routes for the asset and to view which documents require approval for the asset.
31.
Click Save.