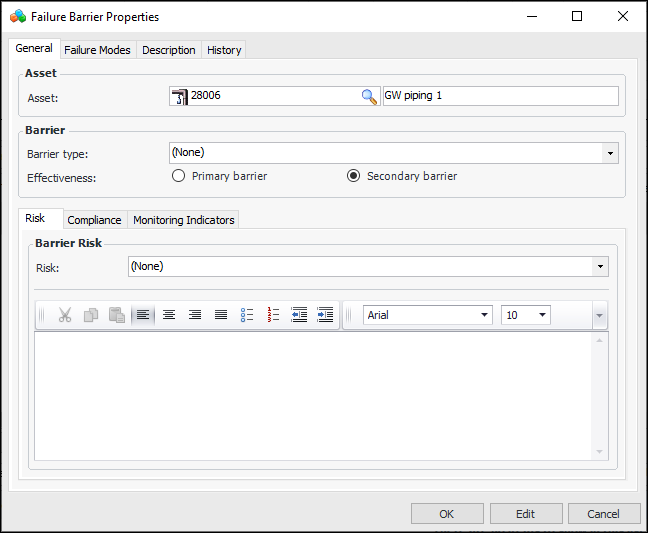
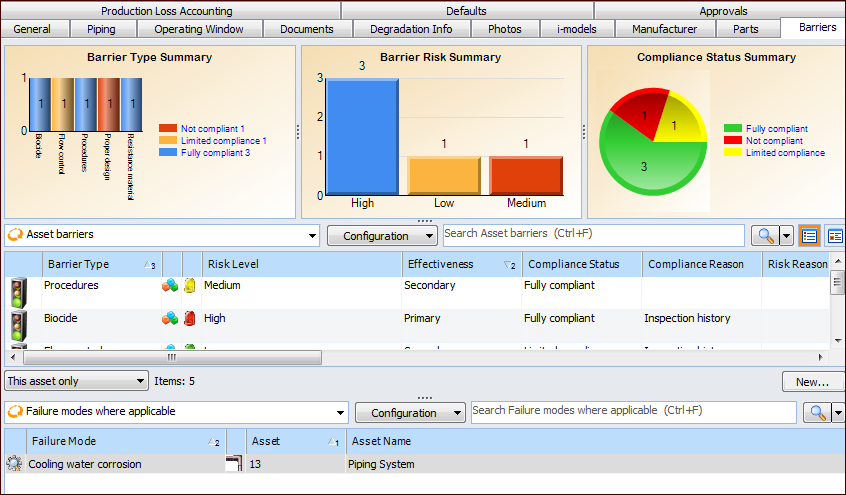
Adding Barriers to an Asset

A barrier is a means of slowing or mitigating asset degradation. For example, coating, lining, and chemical treatment are used to slow corrosion in metal piping.
Note: For barriers to be added to assets, the asset type must be set to allow barriers to be defined for it.

To Add a Barrier to an Asset

1.
Open the asset. On the Properties view, select the Barriers tab.
Note: The Barrier Type Summary, Barrier Risk Summary, and Compliance Status Summary charts shown in this example are set up as sidebar dashboards and assigned to employees. For more information, see Dashboards.
2.
3.
On the Barriers tab, click New. The Barrier Properties window appears.
4.
Primary barrier – The barrier is most effective in controlling deterioration.
Secondary barrier – The barrier does not control deterioration completely or is effective for a limited time. Typically, two or more secondary barriers are assigned to an asset.
5.
On the Risk tab, select a risk-ranking value, for example, “High”, “Medium”, or “Low”. A barrier’s risk ranking identifies the relative severity of the problem that the barrier is meant to prevent or mitigate. Provide a reason for selecting the risk level in the text box below.
6.
Select the Compliance tab and add the following information:
7.
Select the Monitoring Indicators tab. On this tab, you can select or create indicators to be used to check the effectiveness of the barrier.
8.
Select the Description tab to add more information about the barrier.
Tip: The Failure Modes tab lists the failure modes that reference the barrier. The History tab provides an audit history of the actions performed on the barrier record in APM.
9.
Click OK. The Failure Barrier Properties dialog closes and the barrier is added to the asset and listed on the Barriers tab.
Tip: To view information about barrier usage for all assets, select the Assets view on the site window and then the Barriers tab. Select an asset to view its barriers and the failure modes associated with them.