|
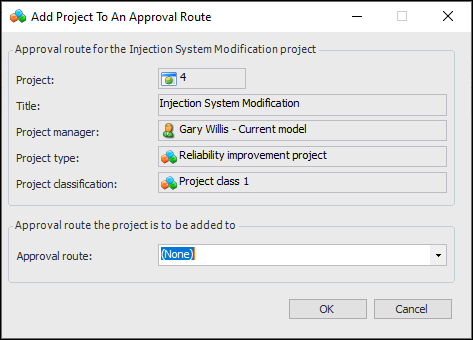
Adding Projects to Approval Routes
Your site’s approval settings determine if projects require approval. When a project is sent for approval, the route selected is based on the project that is being approved. Each approval route for projects can identify the project or projects it can be used with. Alternatively, on the project itself, you can add the project to a new or existing route. Approval route selection is not based on the project’s GL account segment.Tip: You can also browse for projects in the Approval Route window, Projects tab.To Link a Project to an Existing Approval Route
1. On the site’s Work Management view, select the Projects tab and open the project for which you want to select an approval route. The Project window appears showing the Properties view.
3. Select the Approver tab.
• Project will be approved separately – The project has its own approval status. You can also select or create the project’s approval route
• Approval originates with a higher level project – The project’s approval status is based on the status of its parent project. You cannot select an approval route for the project. The project is approved on the same route as its parent project
5. If the project is to be approved separately, click Add to Approval Route. The Add Project dialog is displayed.
6. From the Approval route list, select the route to which you want to add the project. Only routes that can approve projects at the project’s site are available to be selected.
7. Click OK. The project is now listed on the approval route.