|
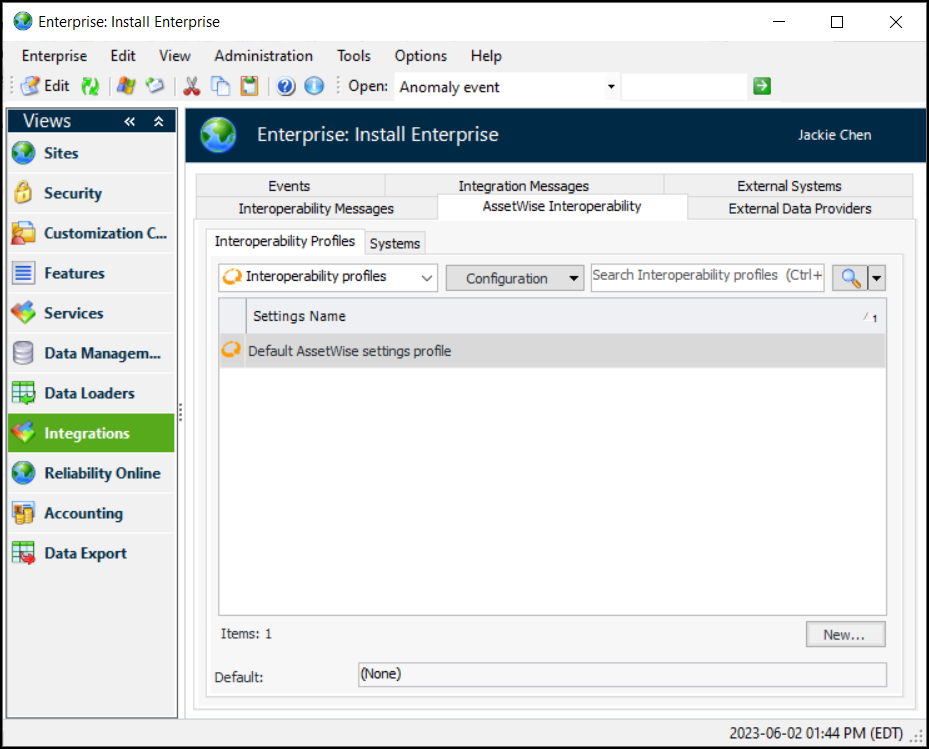
Setting up Site Interoperability Profiles for AWEIS
You can assign a profile in the site’s AssetWise interoperability settings. For more information, see Activating AssetWise Enterprise Interoperability in APM.To Create a Profile
1. In the Enterprise window, select the Integrations view, the AssetWise Interoperability tab, and then the Interoperability Profiles tab.
2. Click New. The Site Interoperability Profile Properties window appears:
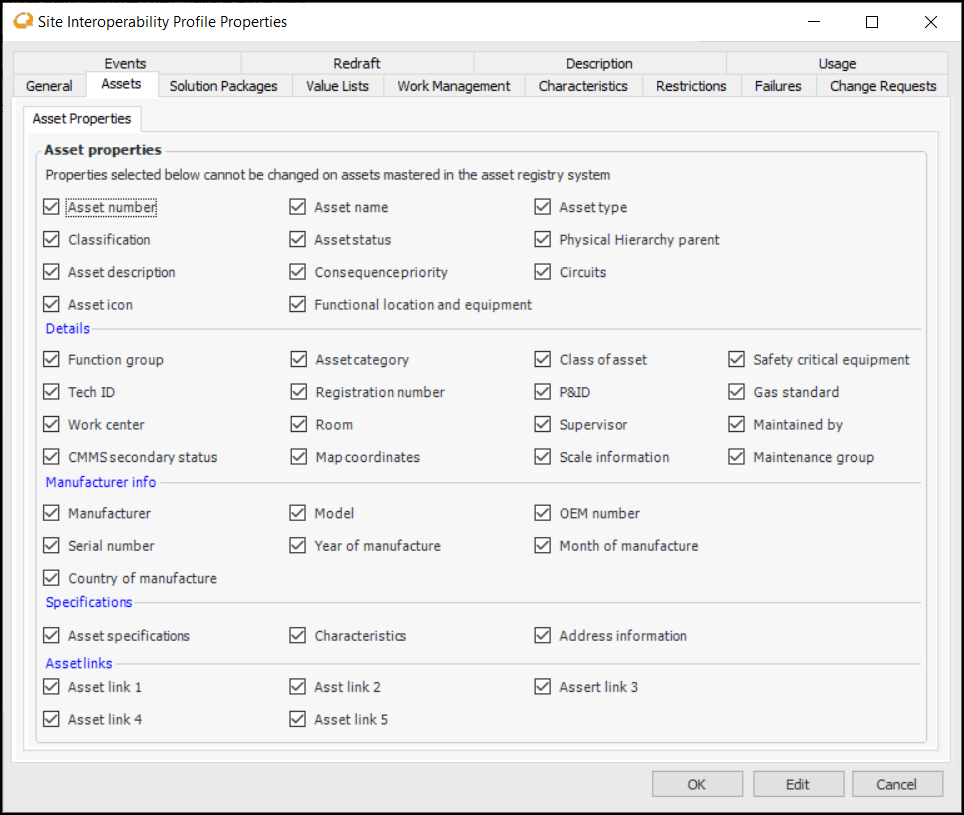
To Specify the Data Available on Sites
1. In the General tab, Reliability program area, specify whether one or both of the following appear in the site’s Reliability Program view:
•
• Shown in the site’s and asset’s Reliability Program view
2. In the Work documents to use area, specify which of the following can be created or referenced when acknowledging indicator alarms, requesting follow-up work, and requesting reliability program reviews:
Determines the system where work documents are sourced. You can select the following work documents:
• CMMS work documents – for example, Maintenance orders and notifications when the CMMS is SAP Plant Maintenance
• APM work documents – Work orders and work requests
• Interop requests for work – Interop work documents
3. In the Work management history to use area, specify whether one or both of the following are displayed in the site’s Work Management view:
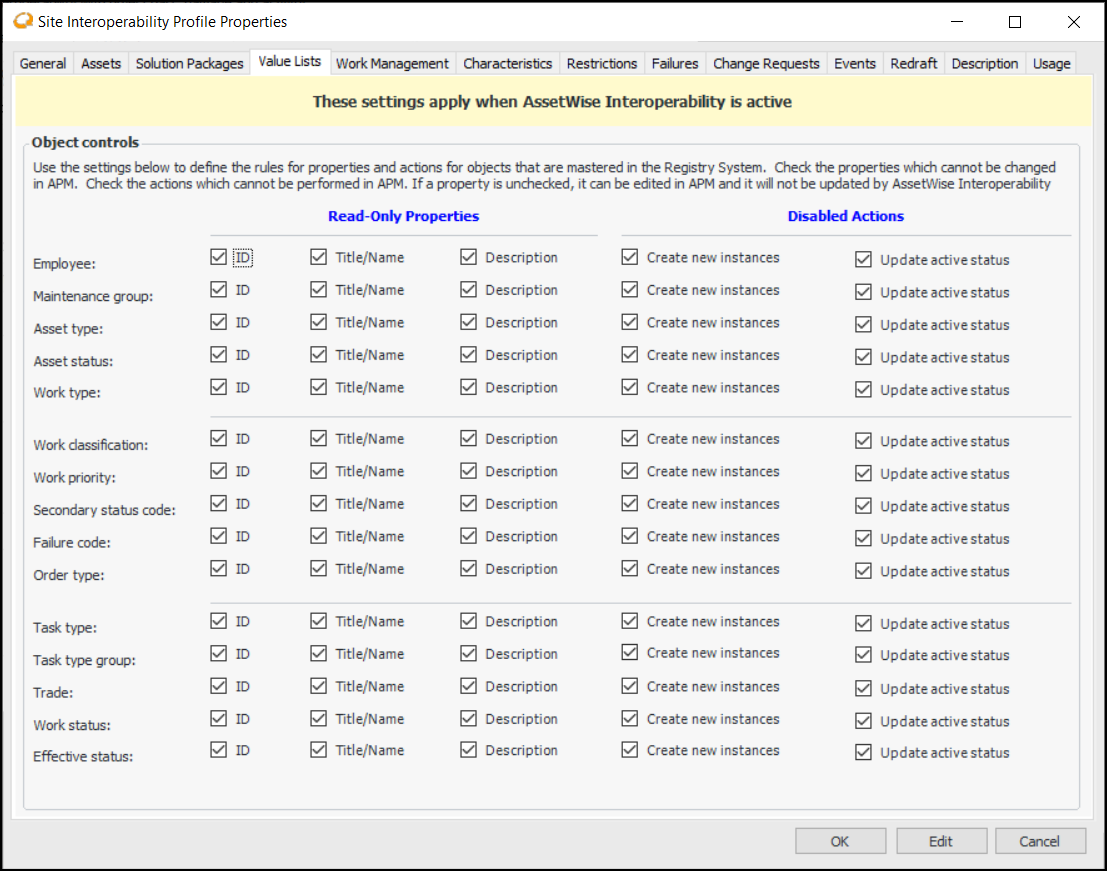
To Use Editing Rules for Assets and Value Lists
1. Select the Assets tab.Properties that are selected on the Asset Properties tab are read-only on interop assets (assets that are mastered by the CMMS). Most of these properties are synchronized with the CMMS assets, which means that they can be changed in the CMMS only and then updated automatically in APM.On the other hand, properties that are not selected on the Asset Properties tab are maintained in APM only. They cannot be changed (for example, set to Null) by AWEIS.
2. Select the Value Lists tab:
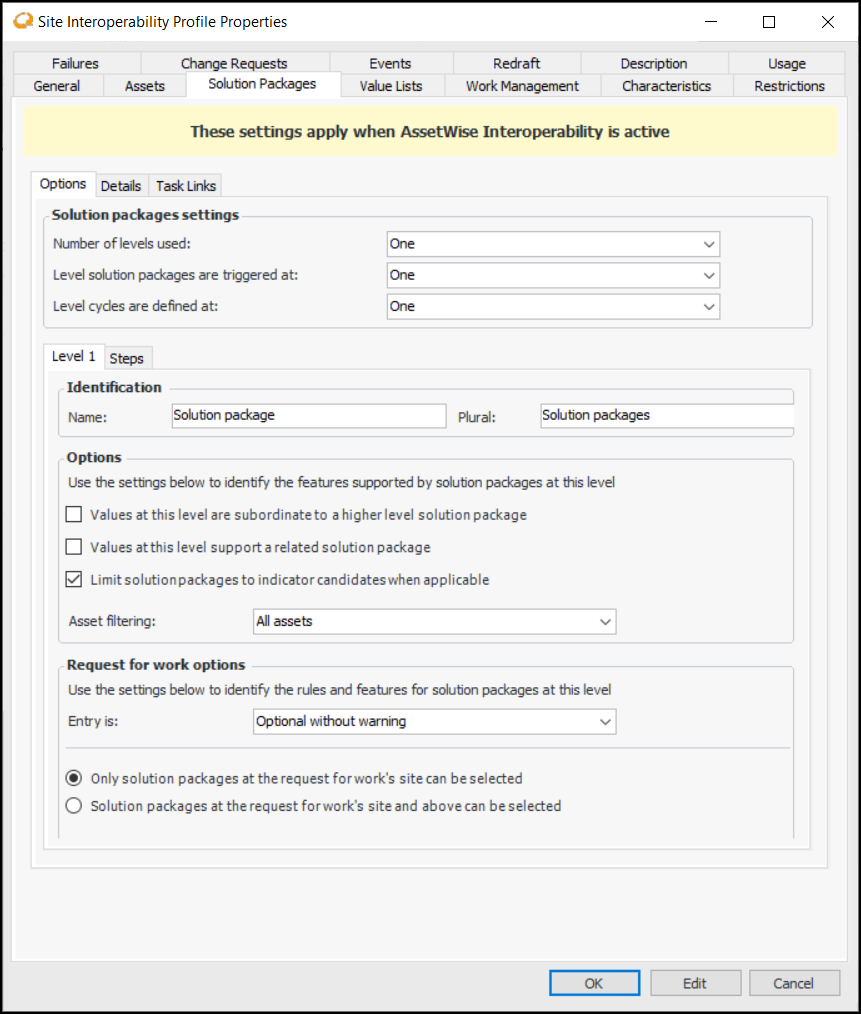
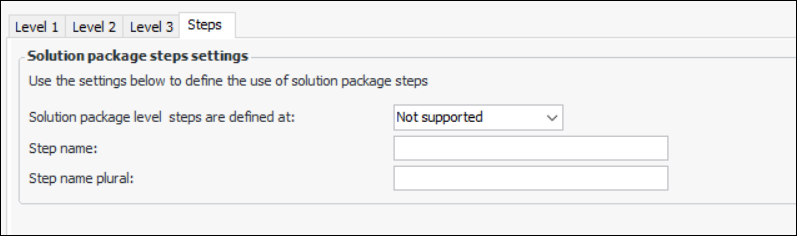
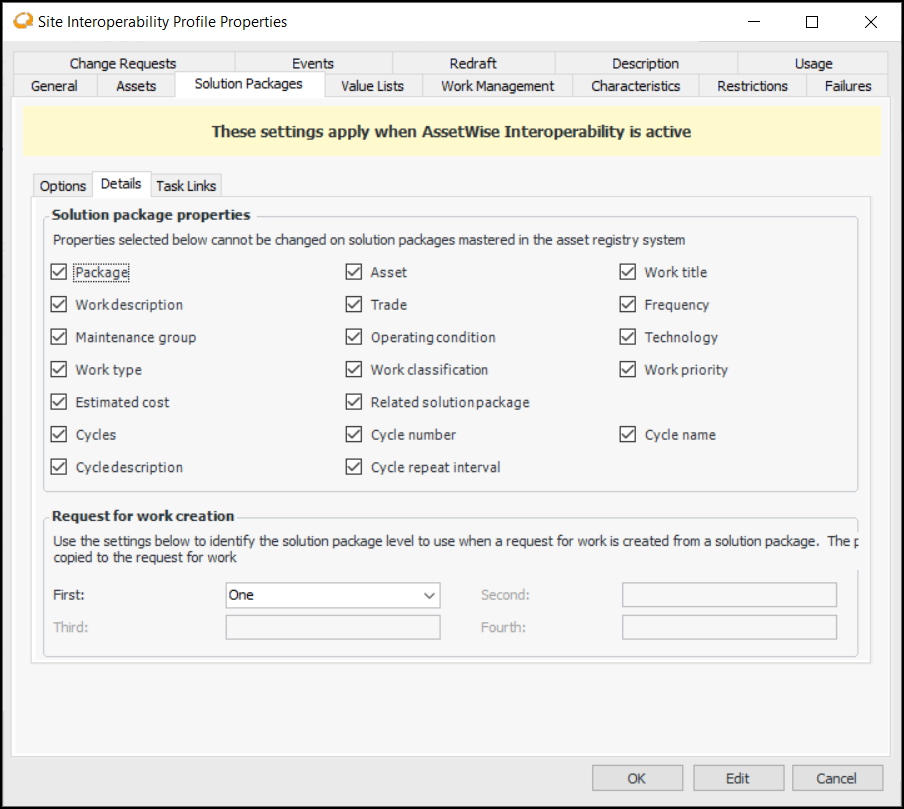
To Set Options for Solution Packages
1.
2. Select the number of solution package levels that will be used at the site, from “One” to “Four”. A Level tab is added for each additional level. For example, if you choose to use four levels, Level 2, Level 3, and Level 4 tabs are added so that you can specify options for each level.
5. On each Level tab, set the appropriate options:
This option identifies the level as supporting related solution packages. The related package is displayed in the Solution Package window, Properties view, General tab to show the link between the two packages.
•
6. Select the Steps tab:
8.
9. Properties that are selected in the Solution package properties area are read-only on solution packages, which means that they can be changed in the CMMS only and will then be updated in APM.
10. In the Request for work creation area, identify the level to use a request for work is created from a solution package.
11. Select the Task Links tab. Specify the incremental value to use when numbering tasks as they are added to a solution package. For example:
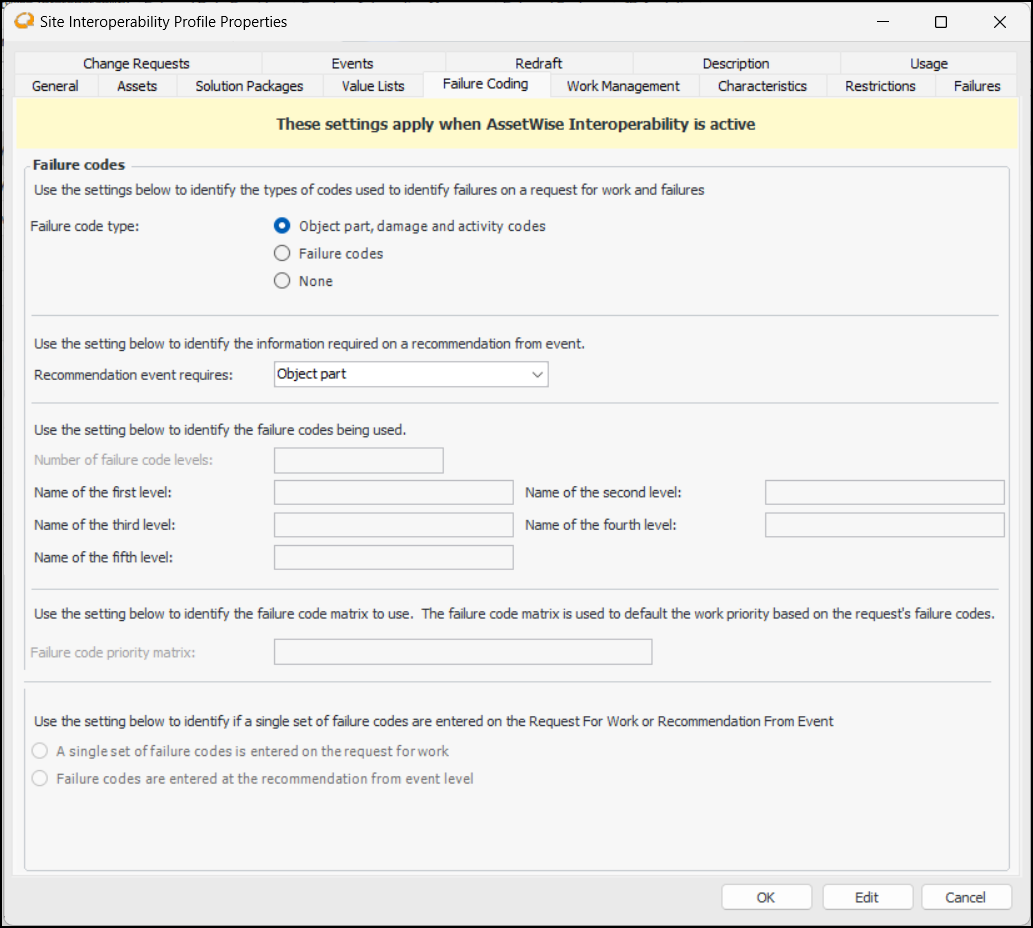
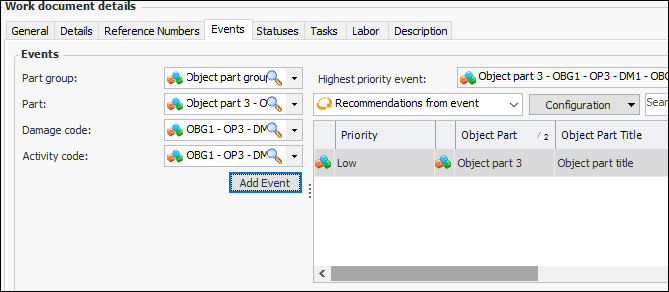
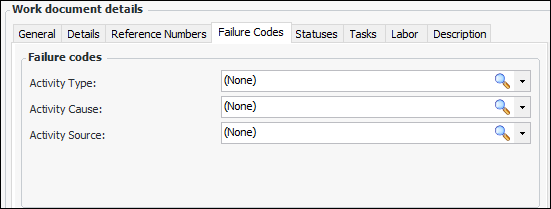
To Set up Failure Coding
1. Select the Failure Coding tab, if it is available. For example:Note: To use this functionality in APM, you must enable feature 46. In the Enterprise window, select the Features view and the Enabled Features tab. Click Browse, select “Failure codes support with AssetWise Interoperability”, and click OK. If APM is running as a smart client, click Refresh Enabled Features on the server. Then restart the client to use the functionality.
• Object part, damage and activity codes – For example, when acknowledging an indicator alarm with a request for work, you can add one or more recommendations for events to the request. Each event can be defined by a part group, part, damage code, and activity code
• Failure codes – You can define as many as five levels of failure codes and name them to match the codes used in the CMMS
• None – Codes are not identified on requests for work and failure records
3. If you selected Object part, damage and activity codes, select an item in the Recommended event requires list. The specified item must be identified before an event can be added to the work document. For example, if “Object part” is selected, you can add an event with only a part number. If “Activity code” is selected, the event must have a part number, damage code, and activity code before it can be added.Here is an example from the Acknowledge Indicator Alarm dialog, Events tab. The Add Event button is not enabled until the activity code is selected:
4. If you selected Failure codes, select the number of levels required. You can define as many as five. Provide names for each of the levels, for example, “Activity Type”, “Activity Cause”, and “Activity Source”. APM uses these names to label failure codes in work documents.Here is an example from the Acknowledge Indicator Alarm dialog, Failure Codes tab:
5. If you selected Failure codes, select a failure code priority matrix from the list. The matrix is used to default the work priority based on the request’s failure codes.
6. If you selected Failure codes, select whether failure codes are selected on the request for work or at the recommendation from event level.
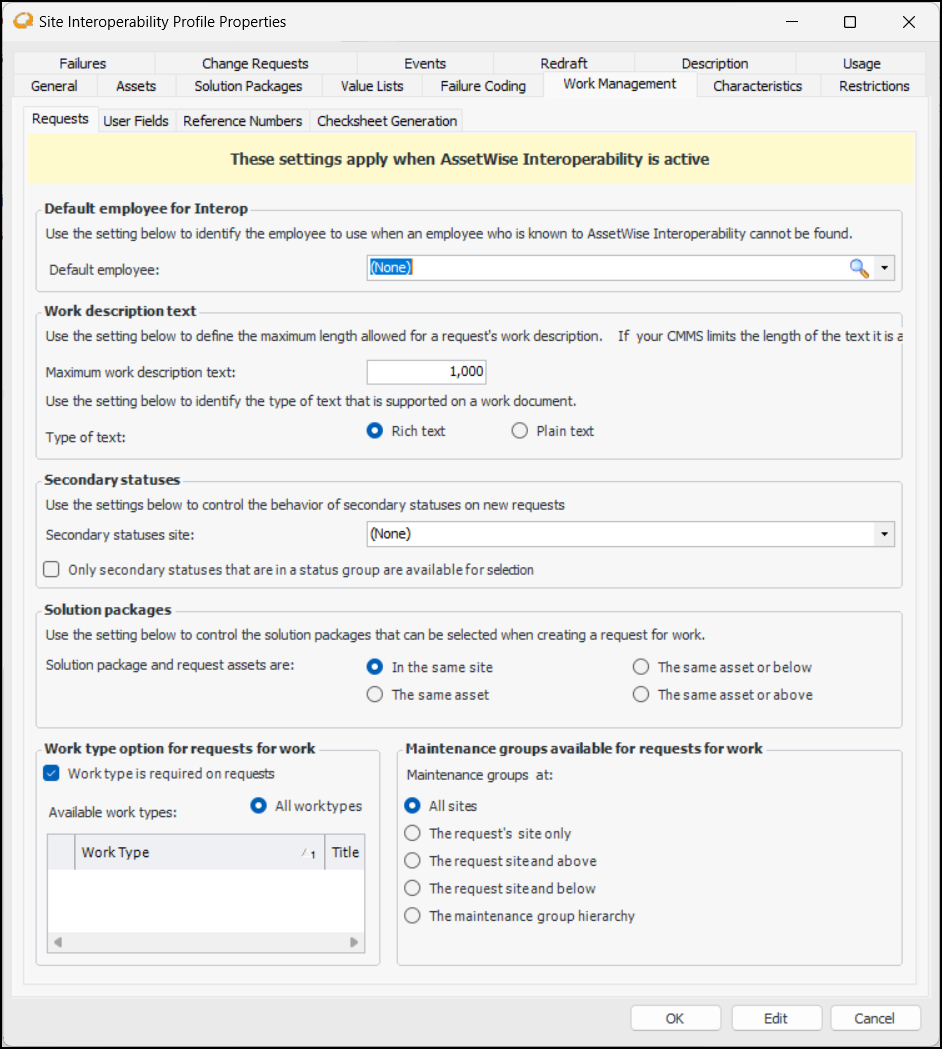
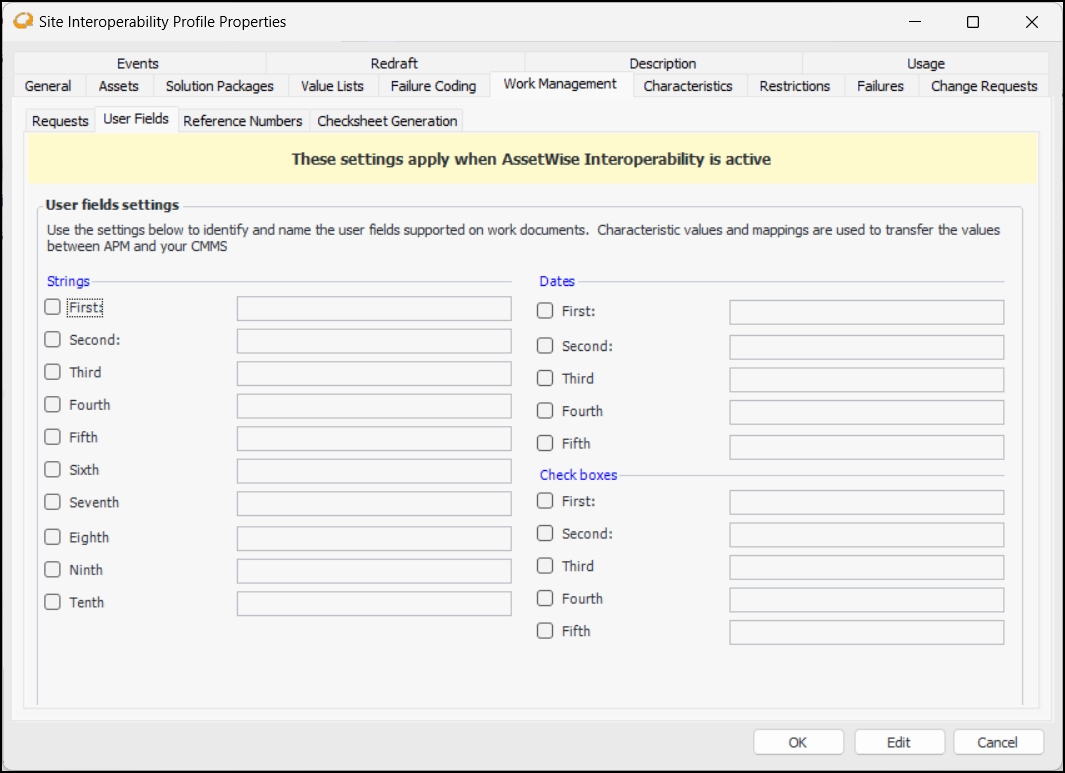
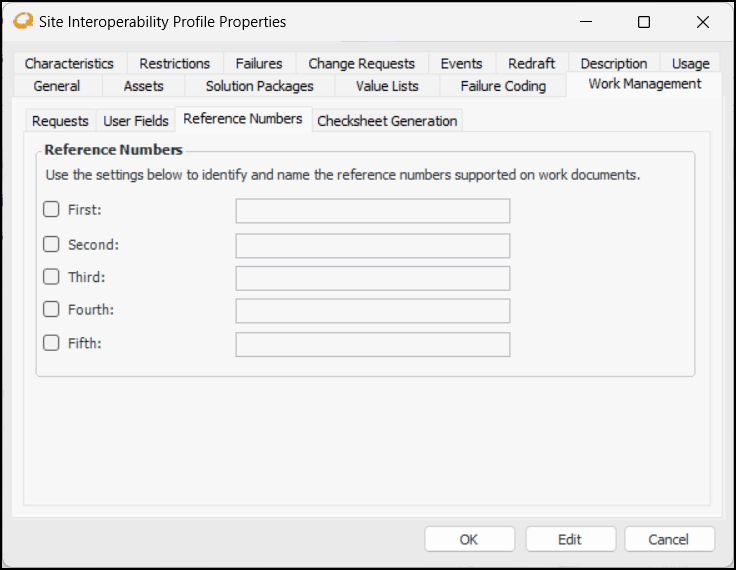
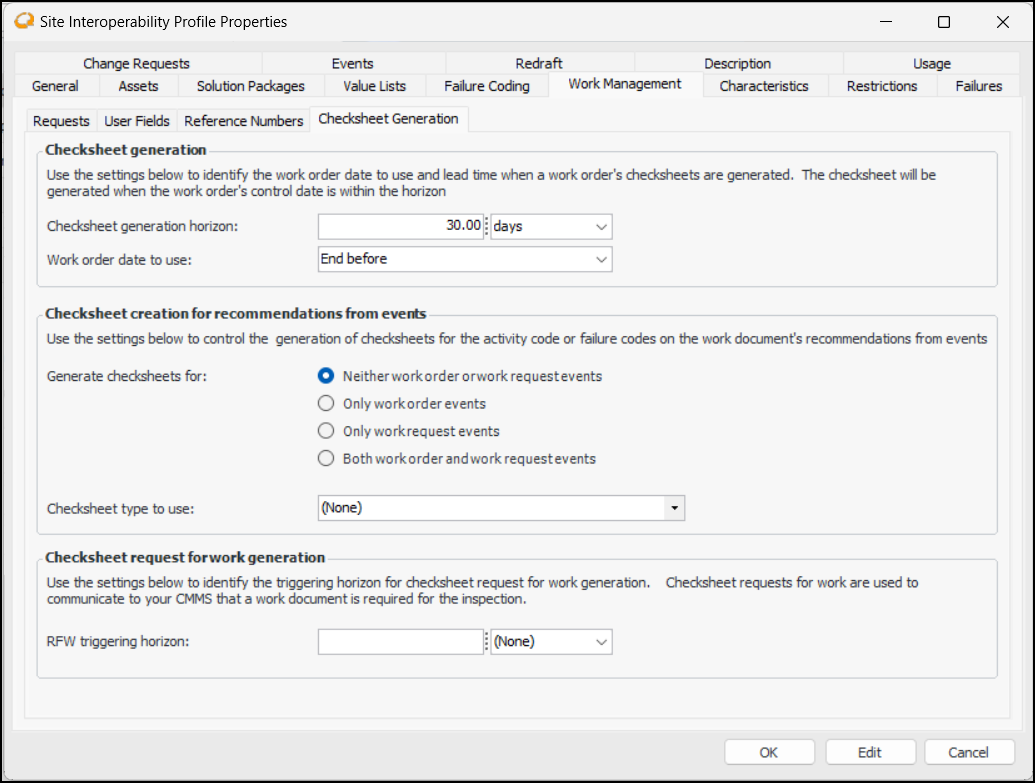
To Set Work Management Options
1.
3. In the Work description text area, you can specify the maximum number of characters allowed in long work descriptions. For example, when requests for work respond to two or more indicator alarms, the compiled descriptions and acknowledgment comments can exceed the length allowed by the CMMS. The maximum number you can enter in the Maximum work description text box is 1,000,000.
4. By default, text in work document descriptions are formated as rich text. If the CMMS does not support rich text, select Plain text as the type of text.
6. When Only secondary statuses that are in a status group are available for selection is selected, statuses that are not assigned to groups are not available for selection in requests for work.
7. In the Solution packages area, you can select an option to filter the solution packages available for selection in a request for work according to the request’s asset.
8. In the Work type options for requests for work area, you can do the following:
• Work type is required on requests is selected by default, which means that requests cannot be saved unless they have a work type. This setting allows you to configure settings that are specific to a work type and site combination. For more information, see Setting up Site-Specific Work Types.
• Select work types for sites with this profile. By default, All work types is selected. You can select Only the work types selected below and then select the appropriate work types in the list.
9. In the Maintenance groups available for requests for work area, you can select the appropriate filter. For example, if you select The maintenance group hierarchy, the site’s top maintenance group and its descendants are available for selection on requests for work.
10. Select the User Fields tab, if it is available. For example:Note: To use this functionality in APM, you must enable feature 48. In the Enterprise window, select the Features view and the Enabled Features tab. Click Browse, select “Support for user-defined fields on AssetWise Interoperability Work Documents”, and click OK. If APM is running as a smart client, click Refresh Enabled Features on the server. Then restart the client to use the functionality.
11. Select the properties you wish to include in interop work documents and provide a label for each one. The properties will be shown in the Details tab of work document windows for requests for work, interop work requests, and solution packages.Note: Additional steps are required to integrate the properties with the CMMS. For more information, see Defining Properties to Display on Interop Work Documents.
12. Select the Reference Numbers tab:Tip: To send reference number values to the CMMS, be sure to set up characteristic map sets for work documents. See Setting up Characteristic Mapping for Interop Work Documents.
14. Select the Checksheet Generation tab:
16. In the Checksheet creation for recommendations from events area, specify the interop work documents, if any, for which checksheets can be generated. The work document must be included in a request for work’s events, and the work document’s activity code or failure code must support checksheet generation. Possible values are:
18. In the Checksheet request for work generation area, you can set a triggering horizon (for example, 30 days) for requests for work. Requests for work are generated when checksheet planning dates are within the horizon.
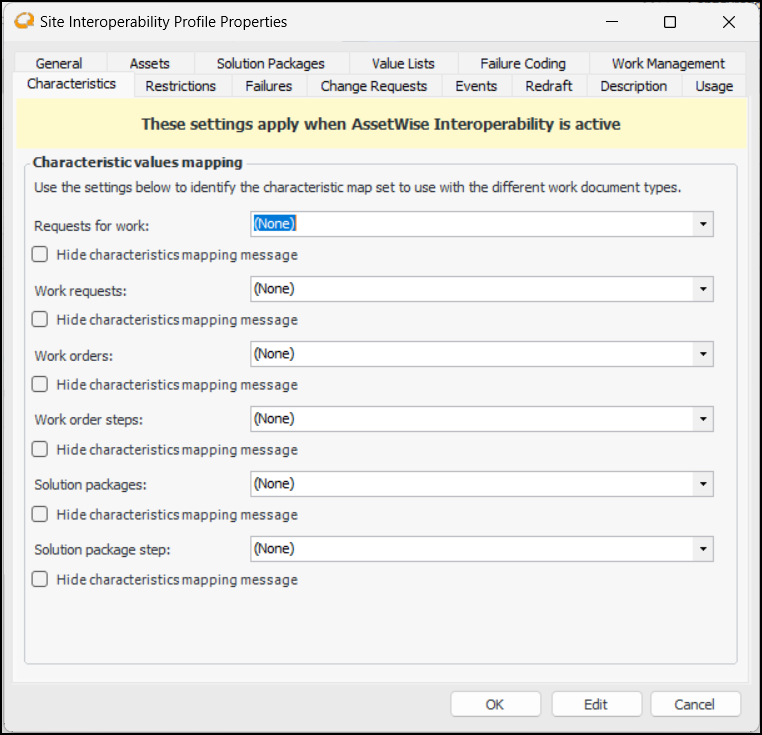
To Select Characteristic Map Sets for Work Documents
1. Select the Characteristics tab:If this step is missed, a message is displayed in the work documents’ Characteristics tabs in APM. For example, if a map set has not been selected for requests for work, in all Request for Work windows, the Characteristics tab displays a message in the banner, as well as the Edit Settings button. Using the settings dialog, you can select the map set. If needed, you can define characteristic classes, add characteristics, and select default characteristic classes for sites using this dialog.
3. If you do not intend to use characteristic mapping for a type of work document, click Hide characteristics mapping message. This prevents the message from appearing in the document’s Characteristics tab.
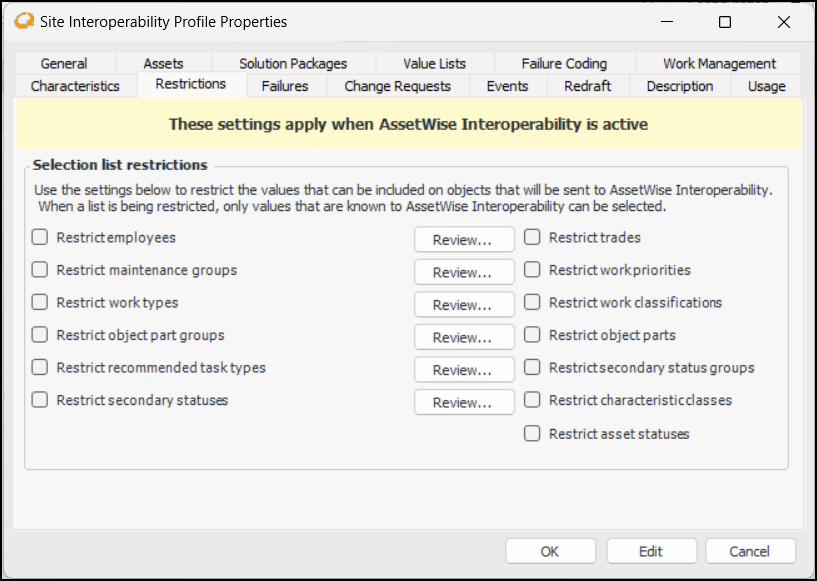
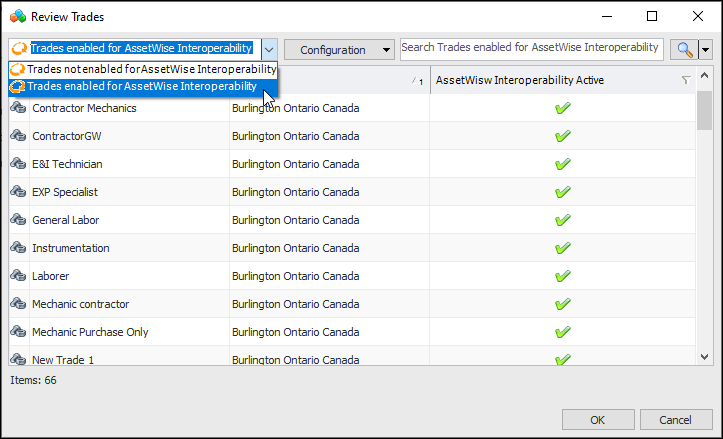
To Set Selection List Restrictions
1. Select the Restrictions tab.Tip: Click Review for any value type to see items that are – or are not – enabled for interoperability. For example:
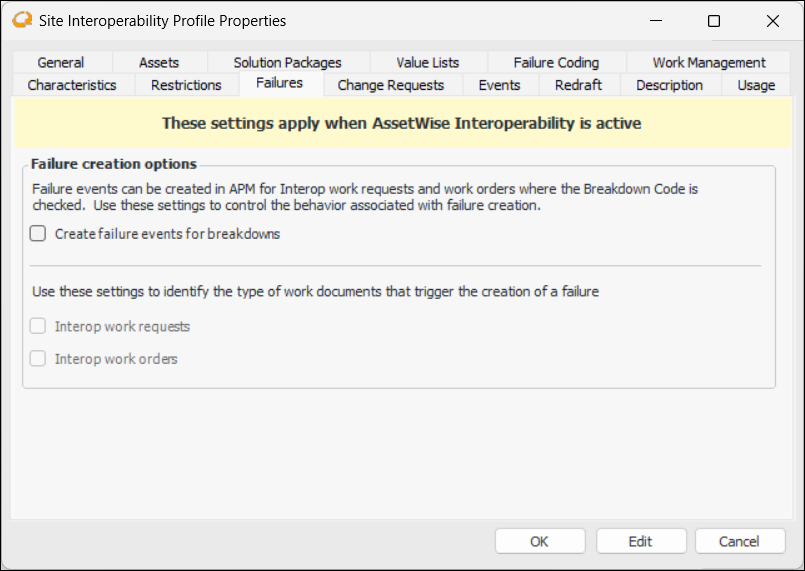
To Set Failure Creation Options
1. Select the Failures tab:Note: To use this functionality in APM, you must enable feature 35. In the Enterprise window, select the Features view and the Enabled Features tab. Click Browse, select “Failure creation from Interop work requests and orders”, and click OK. If APM is running as a smart client, click Refresh Enabled Features on the server. Then restart the client to use the functionality.
2. Select Create failure events for breakdowns to enable the other options.
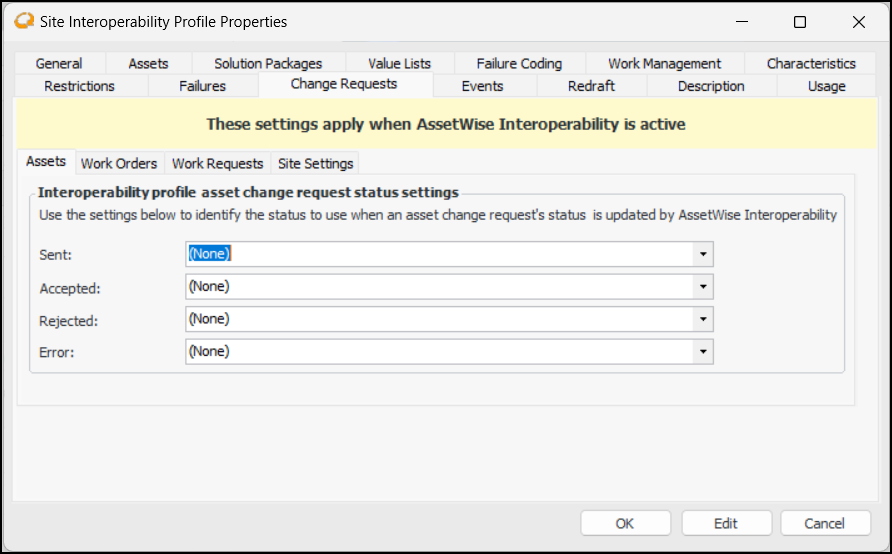
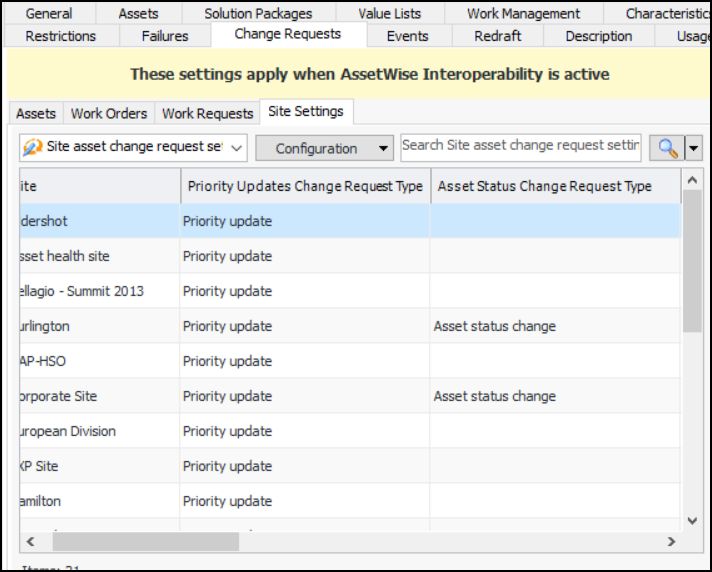
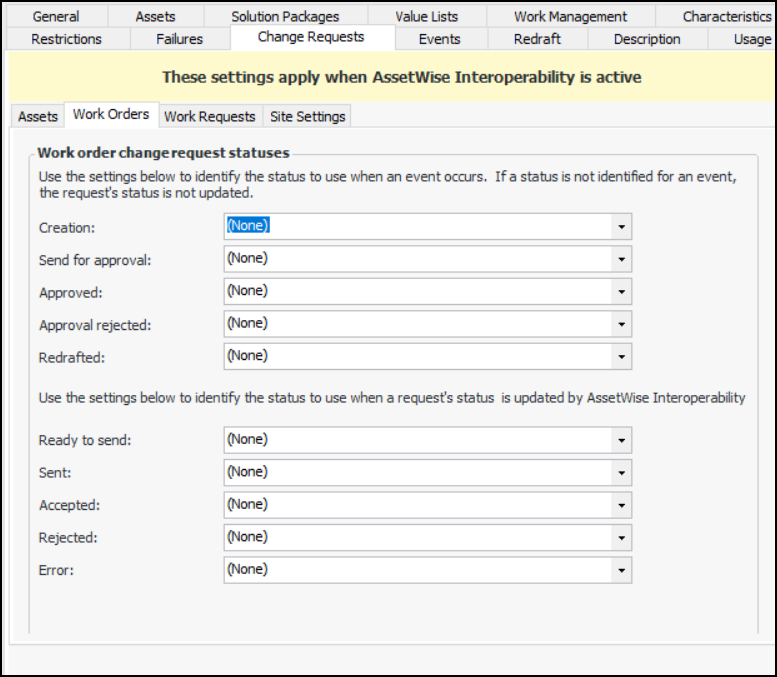
To Set Change Request Defaults
1. Select the Change Requests tab.Note: To use change requests, you must enable features 28 and 77. In the Enterprise window, select the Features view and the Enabled Features tab. Click Browse, select “Asset change requests”, select “Support for Interop work document change requests”, and click OK. If APM is running as a smart client, click Refresh Enabled Features on the server. Then restart the client to use the functionality.
2. Select the Assets tab. When an asset change request is sent to the CMMS, AWEIS returns a status and message to APM. Select the asset change request statuses to assign to requests in response to the statuses returned from the CMMS.Note: An asset change request status must reference an Interop status (Accepted, Error, Rejected, or Sent) to be available for selection on this tab. See Setting up Asset Change Request Statuses.
3. Select the Site Settings tab to view the sites in the enterprise and their change request settings.You can also edit row cells in place or use the Replace Column Data function to apply a change to a column in all sites. For more information, see Entering Data in Tables and Applying Mass Updates.
4. Select the Work Orders tab.
6. Select the Work Requests tab and select the change request statuses that correspond to interop events.
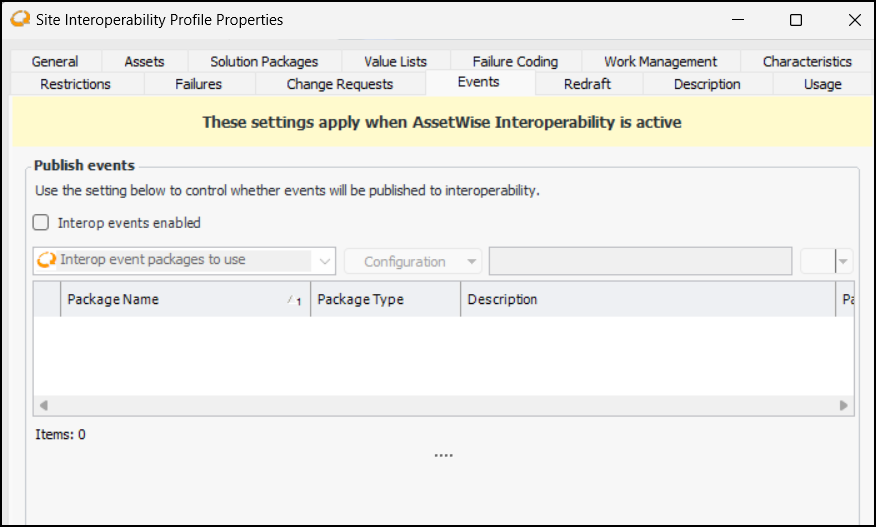
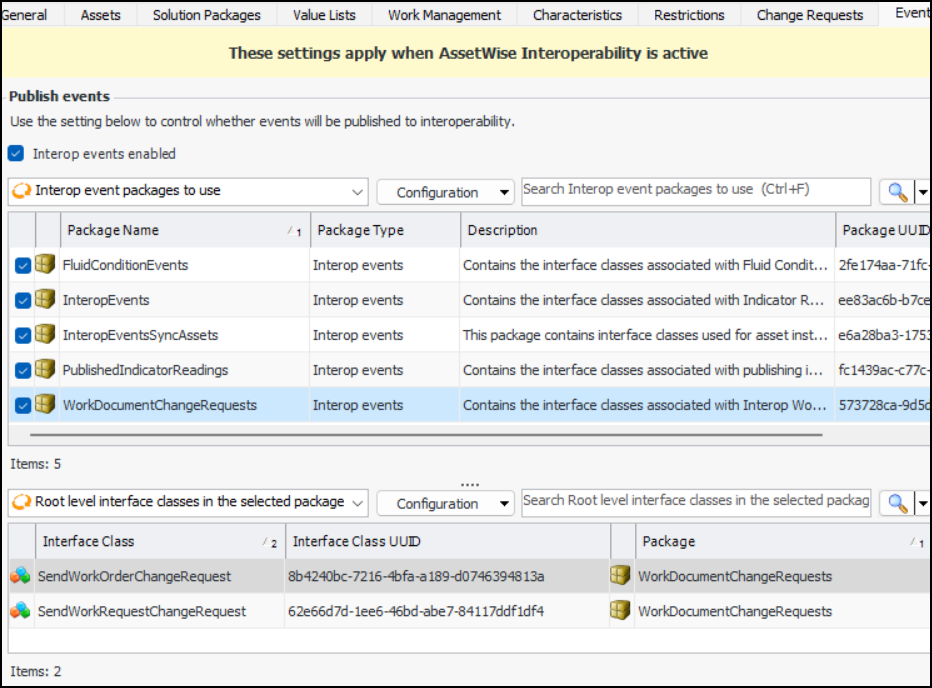
To Enable Publishing APM Events to AWEIS
1. Select the Events tab.When APM objects are created, updated, or deleted, events can be produced (serialized) and published to an external system using AWEIS. Configuring this functionality involves creating an APM outbound event service provider and configuring a service instance. For more information, see Setting up APM Outbound Events.
2. To implement outbound events, select Interop events enabled and select the interface package(s) to use. For example:
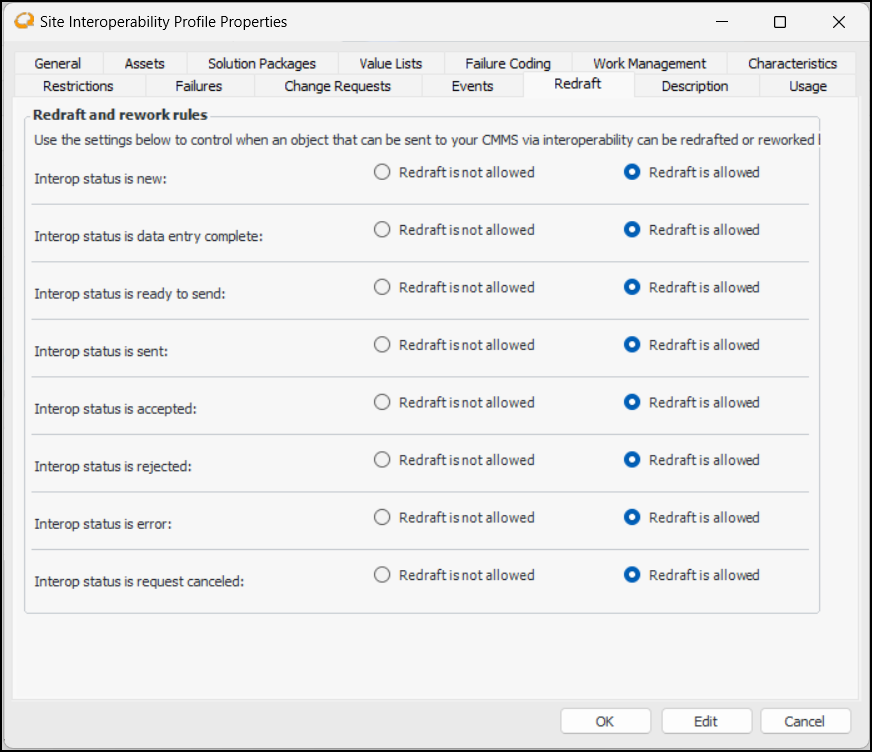
To Set Redraft Options for Approvals
1. Select the Redraft tab.
2.To Complete the Interoperability Profile
1. Select the Description tab to add more information.
2. Click OK. The window closes and the profile is added to the table.Tip: When the profile has been in use for a while, you can return to this window and select the Usage tab to view a list of the sites to which it has been assigned.