|
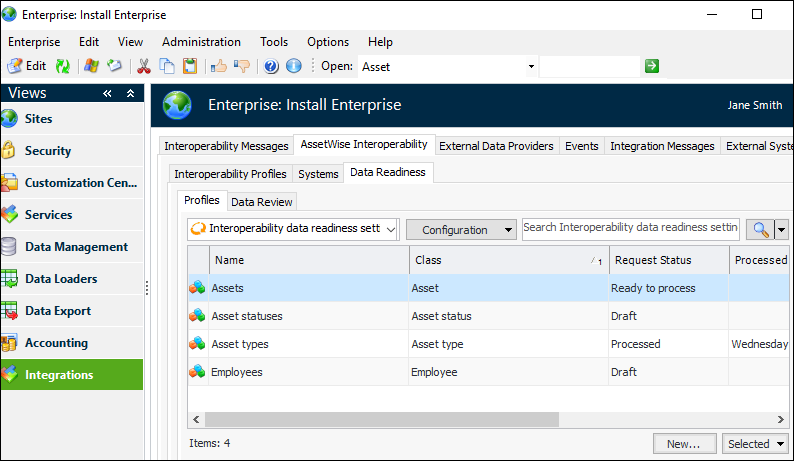
Preparing APM Data for Interoperability
Note: To use this functionality in APM, enable feature 36. In the Enterprise window, select the Features view and the Enabled Features tab. Click Browse, select “Updating existing data to be ready for use with AssetWise Interoperability”, and click OK. If APM is running as a smart client, click Refresh Enabled Features on the server. Then restart the client to use the functionality.Requests have the status “Draft” when they are created. They must be marked as “Ready to Process” before they can be processed. You can control the request’s status in the Interoperability Data Readiness Request dialog using the Mark as Ready to Process button. You can also change the request’s status in the Profiles tab, which lists all of the requests. Select a request in the table, click the Selected list, Mark As, and then either Ready to Process or Draft. Note that the Selected list is not available for processed requests.
•
•
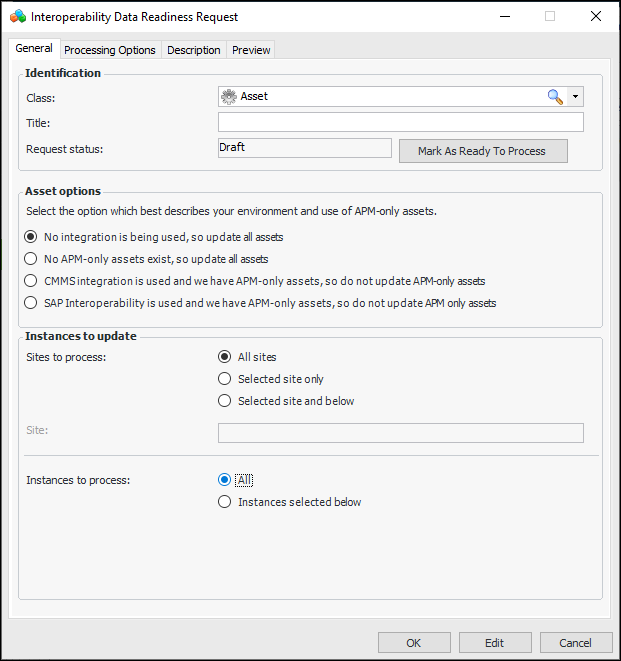
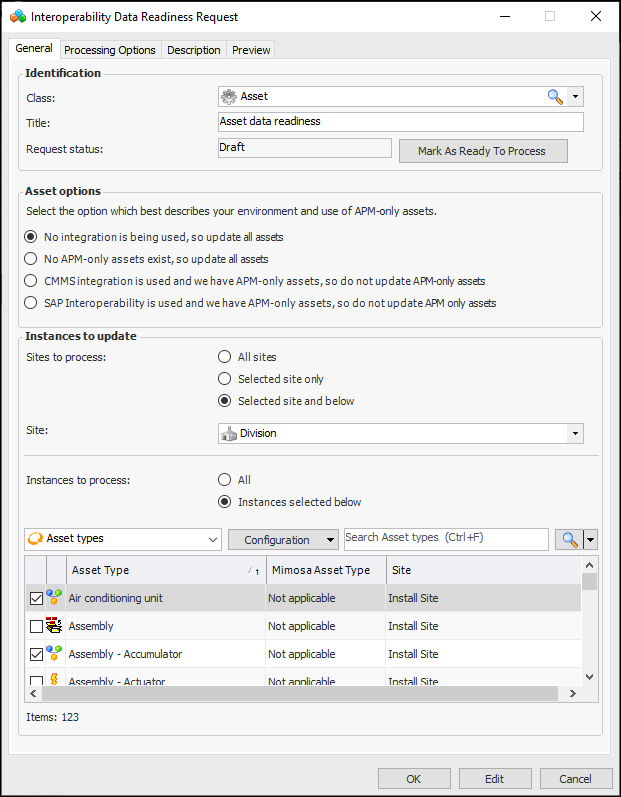
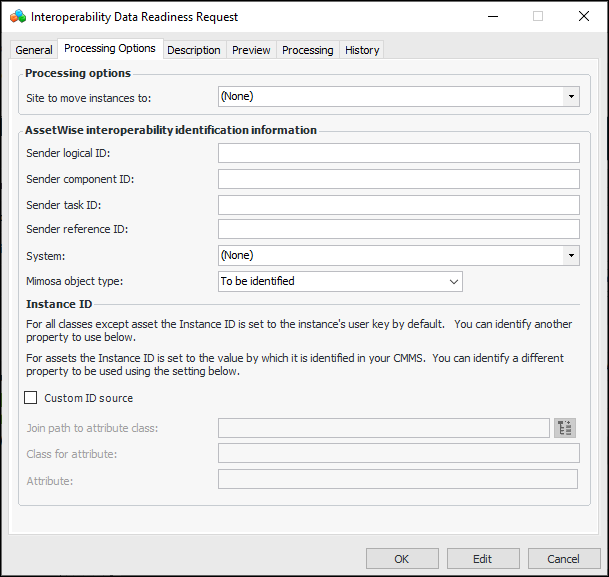
•To Create a Data Readiness Request
1. Open the Enterprise window, select the Integrations view, AssetWise Interoperability tab, Data Readiness tab, and Profiles tab.This tab lists existing requests and shows processing information. When a request’s status is “Ready to process”, the Process option is available when it is selected in the table.The Data Review tab provides configurations that show instances that are or are not ready for interoperability. For example, select “Assets - not ready for AssetWise Interoperability” in the configuration list to view assets that have not been processed, along with their asset types and sites.
2. Click New. In the Interoperability Data Readiness Request dialog, select the class from the list. This example shows the Asset class selected:
5. Select the Processing Options tab to enter properties that will be copied to the Interoperability information of updated objects.
7. In the AssetWise interoperability identification information area, you can provide details to identify the sender. AWEIS provides this information about middleware processing in some objects’ interoperability audit history.
10. Select Custom ID source if you wish to select a different Instance ID. Then select an attribute from the current class or a related class (using the join path).
11. Select the Description tab to provide more information.
12. Select the Preview tab to view the objects that will be updated.
13. When you are ready to process the request, select the General tab and click Mark as Ready to Process. Its status changes to “Ready to process” and the button label changes to Mark as Draft. Close the dialog.
14. To process the request, select it in the Profiles tab, click the Selected list and then Process. A Progress message might appear for large requests. When the process completes, the “Processed On” and “Processed By” columns are populated for the request.Tip: Open the request dialog and select the Processing tab to view the updated objects.