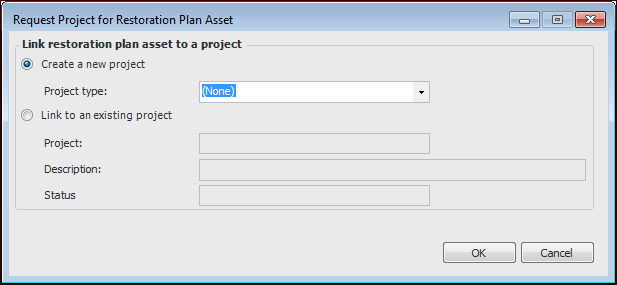
Linking Restoration Plan Assets to Projects

Restoration plan assets can be associated with projects to track the restoration work. You can create a project for a plan asset or link the asset to an existing project. Each plan asset can be linked to more than one project. Similarly, a single project can have more than one plan asset linked to it.
Note: The plan asset’s status must allow its properties to be updated before you can link the asset to a project.
Note: The project’s status must allow the project definition to be changed before it can be linked to a plan asset.
To view the projects linked to a plan’s assets, open the Asset Restoration Plan window for the asset and select the Projects tab. When viewing a Project window, you can see a list of the plan assets that are linked to it in the Properties view, Restoration Plans tab.
This topic explains the basic steps for linking a plan asset to a project from an restoration plan. For detailed information about projects, see Projects.

To Link a Plan Asset to a Project

1.
2.
Tip: You can also double-click the asset to open the Asset Restoration Plan window. Select the Projects tab and click Link to Project.
The Request Project for Restoration Plan Asset window appears:
3.
Click Create a new project.
Click OK. A new project is created and the Project window appears. The plan asset is referenced on the Properties view, Restoration Plans tab.
4.
Click Link to an existing project.
In the Project box, click the browse icon () to open the Project Selector dialog. Select the project and click OK. The project name, description, and status are added to the Request Project dialog.
Click OK. The Project window appears. The plan asset is referenced on the project’s list of linked restoration plan assets. When you are finished, close the Project window.
You can link the plan asset to as many projects as required.